Showing posts with label Tangzhong. Show all posts

Saturday, June 1, 2013

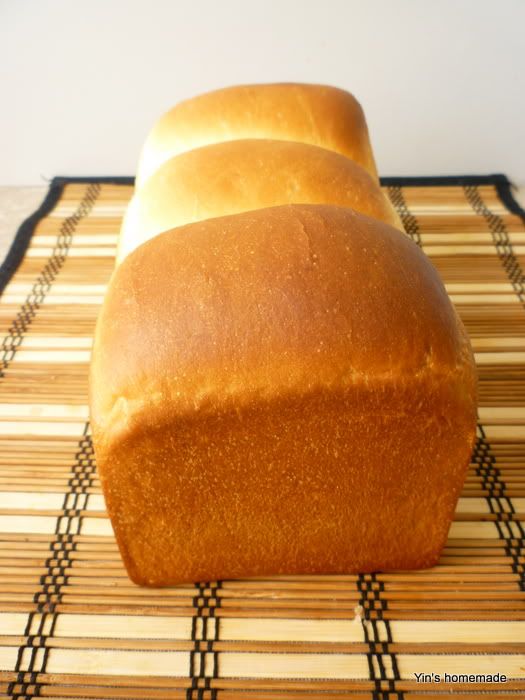
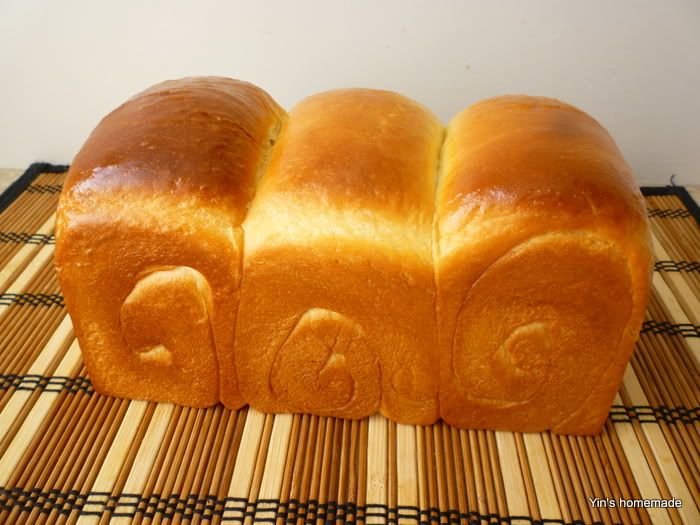
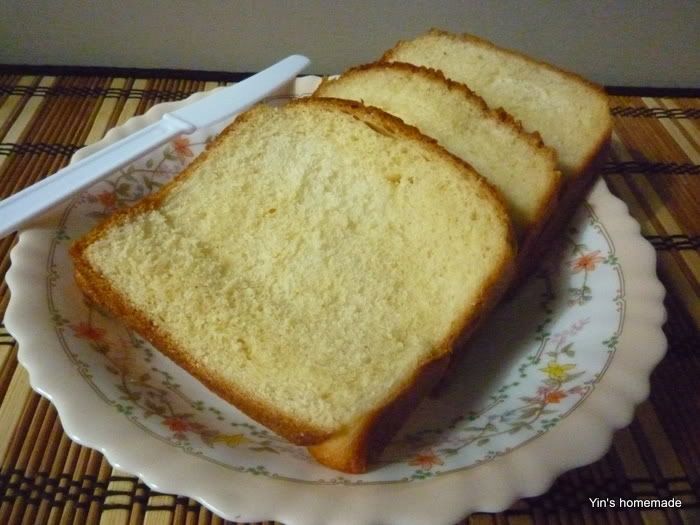
WHOLEMEAL RYE BREAD (TANGZHONG) 湯種黑麦面包

 
Diet? Why not a piece of rye bread

Nowadays, to optimize health benefits, more and more health conscious people opt to eat bread made of wholemeal grain rather than plain flour bread.  Many believe, in fact is also proven, that bread made of wholemeal flour which contains higher fibre, vitamins, minerals, and antioxidants than the refined and bleached white bread flour is healthier. Wholemeal promotes weight loss, as it takes longer for the body to absorb than it takes to absorb refined grains. 

I have posted wholemeal bread recipes, click to visit the post here Tangzhong wholemeal bread. To continue in trying out more nutritious multigrain breads, this time I combined wholemeal flour with – Rye flour. Research shows Rye flour is more nutritious than wheat. Rye flour helps to lower insulin response and improves blood glucose profile which reduces the risk of diabetes. It also reduces inflammation in people with metabolic syndrome. Rye bread with higher fibre content makes you feel fuller and satisfied longer than wheat. It also helps to reduce the risk of cardiovascular disease.
WHOLEMEAL RYE BREAD


Wanna have a bite?

For this recipe, I adapted the Tangzhou wholemeal recipe and replaced part of the wholemeal flour with rye flour. I found with the rye flour mixture, the texture of the bread was softer and lighter than wholemeal flour by itself.  
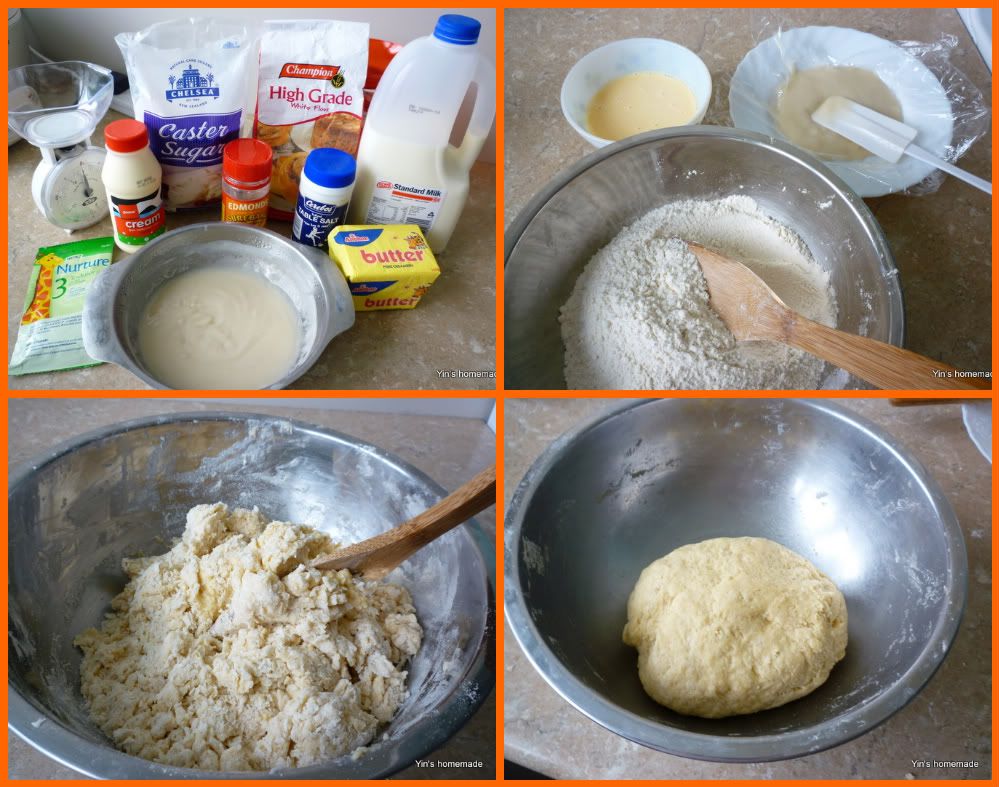
Click more to check out the step by step slideshow.


Tuesday, February 28, 2012

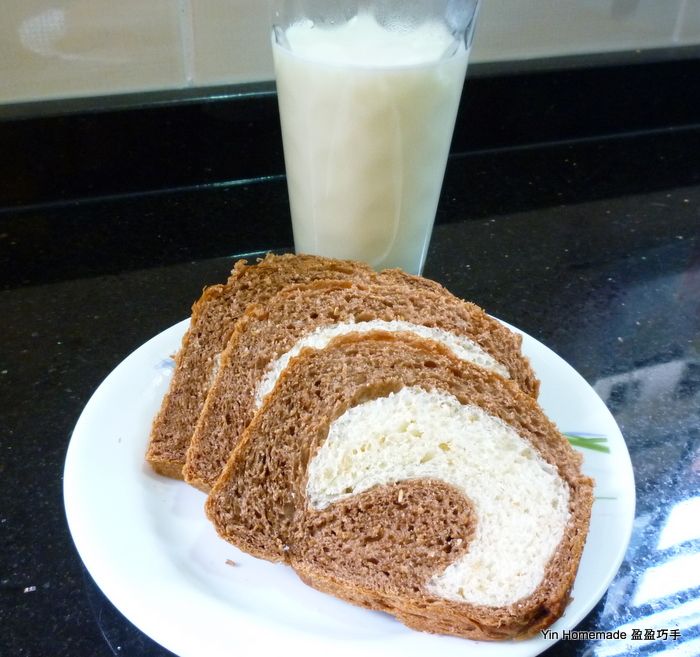
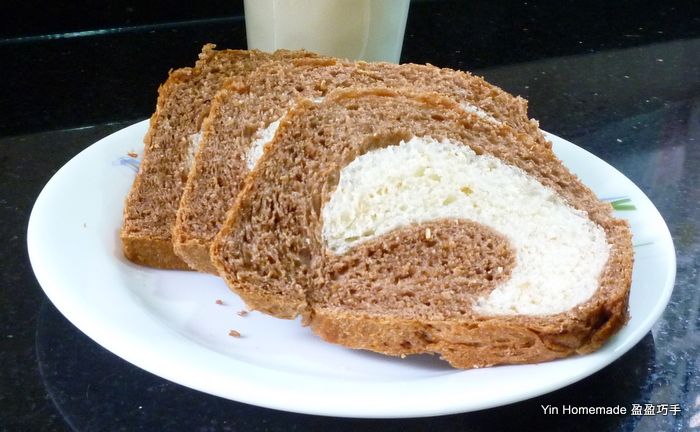
Wholemeal Chocolate Marble Toast Bread 可可双色土司

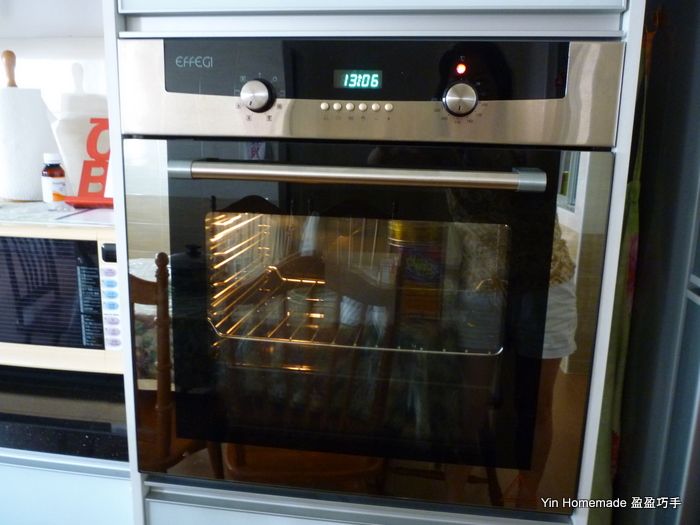
My new Oven is in action!
It has been a while since I last baked. Part of the reason was work while another was the condition of our house that underwent a major renovation for an extended period of time.
I was waiting to get the new kitchen ready with a new oven before I could start to try out new baking recipes. However, it took us more than 4 months to get the house ready before I could put on an apron to try out a new oven in a whole new revamped kitchen.
I was quite excited waiting to play with this kitchen new toy, thinking that I could finally retire my little desktop oven and shelved it in a storage room.  However, to my disappointment the very moment I switched on the oven, it tripped the power supply to the entire house! It took another few weeks for us to arrange for warranty claim and technical support to fix and reinstall the oven before I got to use it again.
Finally, we had a pilot by baking Vanilla muffins last month; Ming Ray was the main master chef in coming up with a successful batch of baking from the oven.
Subsequently, that night I used it for my signature roast pork.  The pork was a bit burnt out, as I was still trying to play around with the oven temperature. This new oven was a bit more sophisticated than the one I used in Auckland.  It had more heating functions, more choices of heating elements and if desired the option to turn on a fan to help circulate the heat inside the oven. I was not familiar with it initially, definitely far more complicated than my little desktop oven! J

Last weekend, I finally made my 1st loaf of bread in 2012.  This was another recipe adapted from Tangzhong (water-roux) bread from Taiwan famous baker 孟老师的100道面包. If you’ve been following my blog you would know Tangzhong was one of my favourite bread baking method which guaranteed a soft and fluffy bread texture.
Actually this was not a new recipe to me, I did try this recipe back in Auckland in 2010, however it was a failure back then. (Read the post mortem report here).
This time, I didn’t follow the recipe exactly; I had made minor adjustments because some of the ingredients required was not available in my pantry. I left out cheddar cheese while making Tangzhong, I didn’t mix in chocolate chips and also replaced a portion of high protein flour with wholemeal flour. I wanted to get rid of the balance of 30g wholemeal flour which I had on hand.
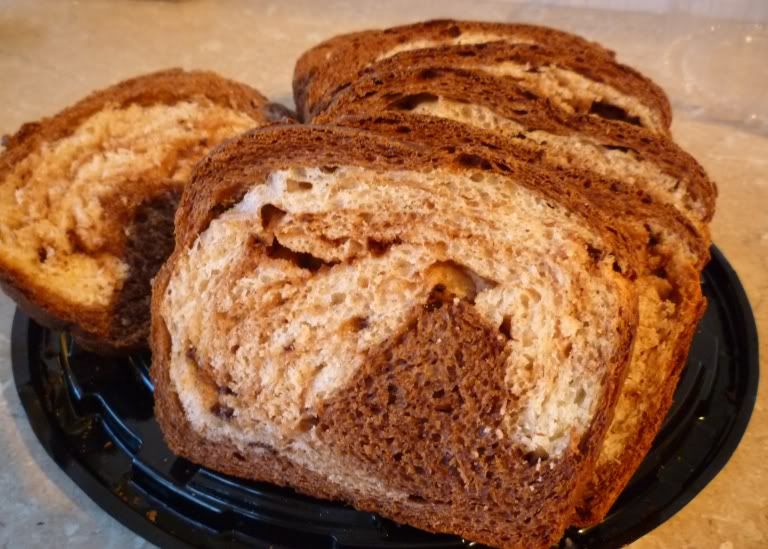
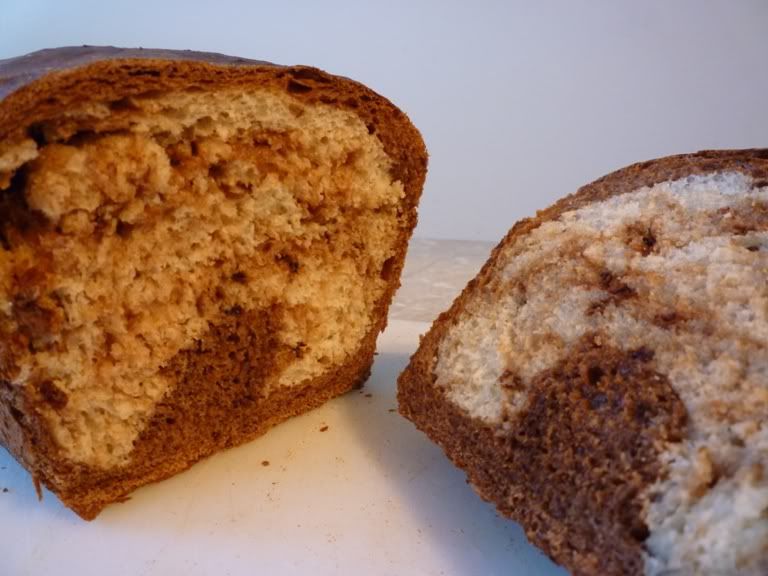
Nevertheless, when I saw the dough rise nicely, I knew these minor adjustments wouldn’t matter much. True enough, the bread came out nicely, soft and fluffy and the brown and white swirl of marble look effect gave great color combination.


Overall, the bread tasted not as sweet as expected as I didn’t place any chocolate chips. The sweetness of the bread depends on the kind of chocolate chips added in and the coco powder used. If milk chocolate chips or sweet coco powder is used, it will be sweeter. I found even if it was not sweet it was still good to eat on its own. J

Friday, October 14, 2011

Meat Floss Mayonnaise Buns 汤种肉松面包


Since I resumed working, I must confess that my passion in cooking, baking and blogging took a back seat in life. If you’ve following me, you would have noticed I was more lax in updating my blog posts than before.  I have to apologise for that.
From my recent posts, you would notice I worked more on baking rather than cooking right.  Frankly, with a full time job, juggling work life balance can be quite demanding.  I am thankful to have our Auntie Lan to come back and stay with us and continue to be our master chef to relieve my burden of day to day cooking. J Having said that, I still try my best to explore new recipes at least once a week in the weekends.
Currently, the baking I continue to do nearly every week is the homemade water roux starter (Tangzhong) bread (汤种面包 ). Last Sunday, I decided to use part of the Tangzhong dough to make Meat Floss (肉松) Mayonnaise Bun.
If you are bread lovers in Malaysia and Singapore, you would have tasted this delicious Floss Bun which was introduced by famous Singaporean chain bakery shops Bread Talk. This signature floss bun once captured many bread lovers’ attention when it was first launched in Singapore and Malaysia, and I was one of them. That time whenever I came across a Bread Talk bakery shop, I would end up buying a few floss buns for breakfast or tea break. J
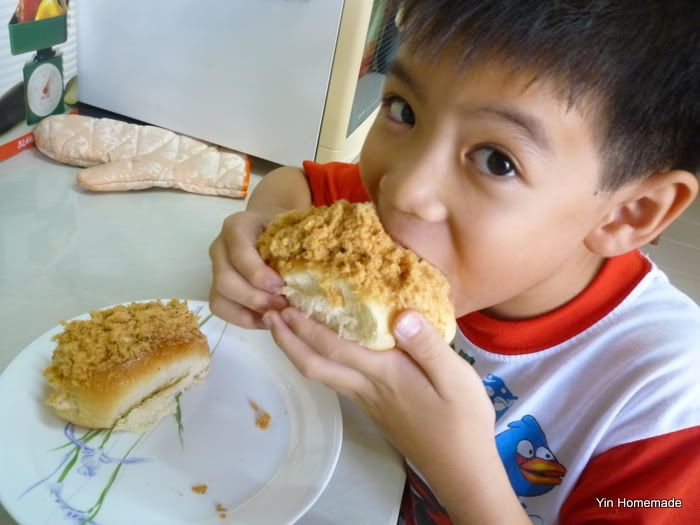
Pork Floss Mayonnaise Buns 汤种肉松面包

Ray with mouth full of pork floss mayonnaise bun

Saturday, June 4, 2011

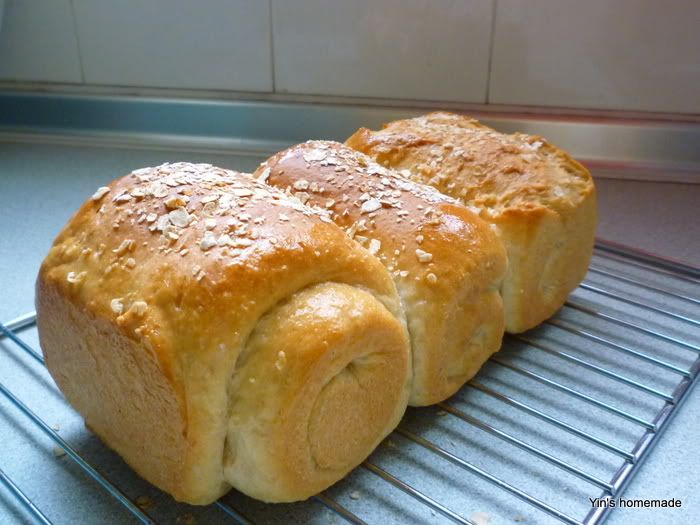
Instant Oat Soya Milk Bread 豆浆麦片土司


Healthy Vegetarian bread

Ever since I successfully made my 1st loaf of Tangzhong (Water Roux Starter) bread, I was addicted to its super soft and fluffy texture. Whenever I think of baking bread I would try out as many variations of Tangzhong bread recipes as possible. With ingredients such as instant oat and sugar-free soya milk, this one was a healthy and nutritious bread and especially great for vegetarians.

The original recipe also suggested adding raisins which I excluded as both Ming Ray and I do not like raisins in bread.

Instant Oat Soya Milk Bread 豆浆麦片土司


Tuesday, May 24, 2011

Custard Fluffy Bread 卡士达超软土司

Back in Action with my little desktop Oven  

After 3 weeks of cleaning up and tidying up the house which we had abandoned for the last 2 years, I was relieved to announce that the house is now decent to stay in. At last I'm back in action and here I'm to introduce to you my Malaysian Kitchen! J

While housekeeping I was happy to discover a desktop oven from the store room which I got from a lucky draw some years ago from the annual dinner of my ex-company. This oven is so new and was hardly used at all. The oven was left in the storeroom as I was not into baking at all before I moved to Auckland. However, now it is time to put it to good use!

For the first few attempts, this desktop oven was not so pleasant to use. My first batch of bread and muffins were not well cooked. I deduced it was mainly due to the oven size and the power setting affecting the baking time. In addition, the aluminium baking ware which I bought here might also cause some minor difference. I was a bit disappointed with the results and was skeptical to use it again.

2 weeks ago, a good friend from Auckland helped to bring back some of my non-stick baking ware and cook books I had been using in Auckland. Last Sunday, Mother's day, I tried out Tanzhong whole meal bread with the loaf tin brought back from Auckland and took account of the longer baking time after learning from the first few failed attempts, I was thrilled that my second attempt of bread making with this small desktop was a success! I shared some of this whole meal bread with my neighbour and was given a thumb up J

With warm temperature all year round in Malaysia, baking bread is so much easier as the bread dough proof so much faster. Within an hour I had a beautifully raised dough. It could never be done in such a short time in Auckland. Looks like this little desktop oven is good enough for me to continue my baking interest!


Sharing below is another variation of super soft Tangzhong toast bread adapted from famous Taiwanese bakery Guru – 孟老师100道面包. This custard bread was so soft and fluffy beyond words to describe. Just give it a try it and I bet you will give a big thumb up for it too!

Friday, April 1, 2011

Milky Cinnamon Rolls 牛奶肉桂卷


This may well be the last blog post from Auckland. By the time this post was published (I set scheduled post), it would be our last day in New Zealand. Very heavy hearted to leave but with family commitments back home, we had to make our move. Farewell New Zealand, it has been a truly fantastic 2 years here, picturesque sceneries, pleasant weather and most importantly warm and friendly people especially the great friendships we had that made us felt so homely and cared for as if this was our first home. We will cherish all these for life!
E noho rā Aotearoa, Goodbye New Zealand! Till we meet again.
This was my last batch of homemade bread using our Auckland kitchen. As can be read from my last few posts, lately I was quite diligent in baking especially into bread making. This was partly because I needed to clear the baking stock in my pantry besides attempting as many bread recipes as I could knowing that I might not have the proper oven facility when I got back to my own Malaysian kitchen.
In my time here in Auckland, this small kitchen especially the oven stove meant so much to me. Not only did I expand my interest in cooking with it, it also helped to take me out of my cooking comfort zone into the baking world. Besides expanding my cooking skills, it brought me into the blogging world. Fingers crossed that I would have the time and opportunity to continue this baking interest.
This milky cinnamon rolls recipe was another Tangzhong recipe I adapted from 65C汤种面包, 陈郁芬. After a few successful batches of bread making using Tangzhong starter with outstanding result, I was encouraged to try more.
For this recipe, I increased the quantity of the ingredients in proportion to the original recipe to make 15 rolls instead of 9 rolls.  I made this last Sunday afternoon. Ming Ray was the first to taste the rolls. He devoured 3 rolls in one go and even ordered to reserve another two rolls for his Monday school lunch. After he had finished, he came to me and said “Mommy, do you know how many points I give to this roll?”  “I give 8 out of 10 points”.  When I asked him why and how to improve to perfect 10, he gave me these suggestions, “I will give 9 out of 10, if there is ice cream topping and 10 out 10 with chocolate chips in it too! “ J


MILKY CINNAMON ROLLS
(makes 12-15)


INGREDIENTS:
A
350g High grade flour (bread flour)
55g Caster sugar
5g Salt
9g Instant dry yeast
B
40g egg, lightly beaten (1 egg reserve the leftover for egg wash)
110g Tang zhong (water-roux)*
110ml milk
C
22g unsalted butter

*Tang zhong (water-roux) starter
25g bread flour
125ml milk
(Refer here for making tanzhong, substitute water with milk)

Filling:
1 tbsp Cinnamon powder (to your liking )
30g Brown/Raw sugar ( I would add more)
80g raisin (optional, I didn’t add as my son doesn’t like it)
25g unsalted butter, melted
 
Hand Knead Method:


1.       Mix all the A dry ingredients in a mixing bowl. Make a well in the centre and add in egg and Tangzhong mix well.
2.       Slowly add in milk, mixture will really sticky, use spatula to mix for 5 min, dough will form rough dough.
3.       Transfer dough to a lightly floured work surface. Knead the dough till smooth. This should take about 10mins.It helps to have a dough scraper or butter knife on hand to scrape up the dough as your knead.
4.       Knead in melted butter, be ready to deal with oily dough and be persevering to knead until dough becomes smooth and elastic. This should take about another 10-20 min (much depend on your kneading skill). Test doneness, if dough can be pulled into a thin membrane without tearing/breaking apart easily, dough is ready to set aside to proof.
5.       Place dough in a lightly greased mixing bowl, cover with light greased cling wrap and let proof in room temperature or warm spot around 28 to 30 degree Celsius for about 2 hour, or until double in bulk.
6.       Mix cinnamon powder and sugar together. Reserve about 1 teaspoon of the mixture.
7.       Once dough double test doneness using finger test, slightly poke a finger into dough and if impression remained, dough has nicely risen. Remove and punch down the dough from the bowl.
8.       Roll the dough into a rectangle, about 25cm by 40cm. Brush surface with melted butter.
9.       Sprinkle the cinnamon/sugar mixture over the dough surface. Roll over the surface with a rolling pin; this is to make sure the fillings will stick onto the dough.
10.   Roll up the dough to form a log shape. Pinch the edges to seal.
11.   Place the log seam side down, trim off the two ends. With a sharp knife, cut the roll into 15 equal pieces.
12.   Arrange the rolls cut-side up lined with parchment paper (or in a greased) square pan or any suitable baking tray.

13.   Leave some space in between the rolls to allow further expansion. Cover with damp cloth or cling wrap and leave shaped dough to proof for the second time for about 45mins, or until double in size.

14.   Brush top with egg wash (mix leftover egg with 1 tbsp water) and sprinkle the reserved cinnamon sugar mixture over the top.
15.   Bake in pre-heated oven at 180 deg C for 15-20 mins or until golden brown. Remove from oven and once cool store immediately in an airtight container.

牛奶肉桂
香甜可口奶味浓的汤种肉桂卷, 吃了齿留香!

A、面包粉 350克、细砂糖 55克、盐 5克、干酵母 9
B、全蛋 40克、牛奶水 110克、汤种 110
C、无盐牛油 30
D、细砂糖 30克,1 大匙肉桂粉(份量随你的喜好)、 葡萄干 80 (可选)

作法:
1、所有A+B料入盆揉成面团,注意盐和酵母不能碰到,不然酵母会死掉。牛奶水最后慢慢加入揉约10分钟。
2、作法1中加C料继续揉到三光(面光、手光、盆光)到扩展阶段,盖湿布室温(室温26-28度)发酵至2倍大。
3、面团排气后拍平,擀成长方形(25cm*40cm),下面要撒手粉。用毛刷在上面刷一层牛油。
4D料中的糖和肉桂粉拌匀,均匀撒在刷过牛油的面团上,将葡萄干均匀撒上(我没有用)。
5、面团由上往下卷起,收口处捏紧,分割成12-15等份,切面朝上将面团放在纸模中进行最后发酵。
6、发到2倍大后约45分钟,表面刷全蛋液,入预热180的烤箱,烤15-20分钟至表面金黄。
7.出炉后表面刷一层熔化的牛油

Wednesday, March 23, 2011

Hokkaido Milky Loaf 北海道牛奶土司


Famous milky bread from Japan, right here in New Zealand!

Last Sunday morning, the online bidder for our fridge finally came to collect her winning bid. Without a fridge, we had to clear our frozen food stuff. Fortunately there wasn't much frozen food in it as I started to control my buying since last week. Thankfully, we had a good friend, Cheng Ee's family staying just a few doors away that I could ask to store some of the frozen meat.

While emptying the freezer, I noticed there was a packet of flaky puff pastry with only 2 sheets of pastry left. Seeing that, I decided to finish off the pastry by making egg tarts for desserts. That Sunday night, hubby's friend Chen Ming and family offered to throw us farewell dinner at our house with Roast duck takeaways, these egg tarts would be perfect dessert to thank them in return.

To make egg tarts I needed to have fresh cream, which was the main ingredient for egg tart filling (you can check out my egg tarts recipe here). But the standard size of a small bottle of fresh cream here is 300ml which was too much to finish for the number of egg tarts that I was going to make with only 2 pastry sheets left. Considering no fridge to store the left over fresh cream, I had to consume this cream on the same day. Since I had to heat up the oven to bake egg tarts, I thought I might as well work on another baking recipe to use up the fresh cream.

I ended up having a real busy baking day instead of a relaxing Sunday. Thank god, the egg tarts turned out well too.

Portuguese Egg Tarts
When I was thinking hard what to bake using this fresh cream, it crossed my mind to give another attempt to make this Japanese milky loaf. I had tried to bake this recipe last year but it did not turn out well. The texture of the bread was not soft and fluffy as it should be but it was too dense. I suspected the dough was under kneaded at that time. I had shared this failure of bread making here.

This Tangzhong (Water Roux) recipe was again adapted from Christine's Recipes. The technique of kneading milky bread was not much different from other Tangzhong breads which I shared here.

The only variation was the ingredient of using fresh cream and milk in replacing water, which was why they called milky loaf. As the name suggested, this bread originated from Japan and the actual recipe used Hokkaido's Furano fresh milk which obviously was not available here. For this recipe, I used local fresh milk and cream instead, so maybe I should rename it to Kiwi Milky loaf instead J

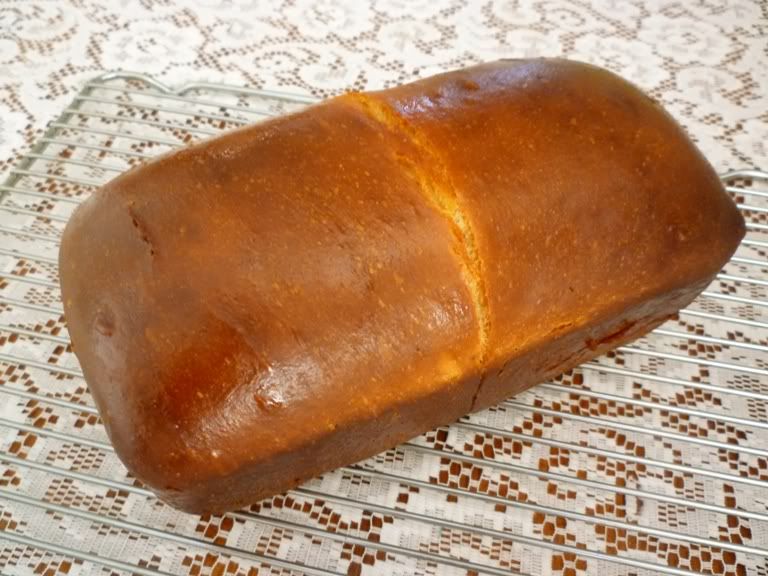
I baked this loaf using a good quality bread pan, a gift from Cheng Ee. The loaf was beautifully baked and easily taken out from the tin.

Before glazing

After glazing with butter

That evening, I gave 2/3 of the loaf away to Cheng Ee and Chen Ming without tasting them. I was quite confident the bread tasted good, this was because when I sliced the bread, I felt the texture of the bread was just right - soft and fluffy.


Hokkaido Milky Loaf 北海道牛奶土司
 I only tasted the bread the following day. I was surprised to have hubby to be the first person to taste it. I was overjoyed when he told me the bread was awesomely good with strong milky flavor and nice to eat just like that. This comment was very encouraging to me especially from a non-bread eater. J


HOKKAIDO MILKY LOAF
Featured in Group Recipes - 23/03/2011
Ingredients

A
450 gm high grade flour (bread flour )
75 gm caster sugar
5 gm salt
8 gm milk powder (optional)
10 gm instant dry yeast
B
1 egg
50ml milk
50ml fresh cream
150 gm Tangzhong (refer here for making tanzhong, substitute water with milk)
C
40 gm butter ( softened at room temperature)

Method:
  1. Combine all dry ingredients: flour, salt, sugar and instant yeast in a bowl. Make a well in the center.
  2. Whisk and combine all wet ingredients: milk, egg and Tangzhong, then pour into the well of the dry ingredients.
  3. Knead until you get a dough shape and gluten has developed about 10-15 minutes (hand knead), and then knead in the butter.
  4. If you hand knead like I do, do expect to deal with gooey dough at this stage. You can opt for bread maker if you have one.
  5. Keep kneading until the dough is smooth, not sticky and elastic. The time of kneading depends on how hard and fast you knead. I used to set the timer to 15 minutes to monitor my kneading time.
  6. Test if the dough is ready by stretching the dough with two hands. If it forms a thin "membrane" that's very elastic in texture. That means you have successfully kneaded the dough to a perfect stage.
  7. If you use bread maker then add wet ingredients into bread maker first, then followed by the dry ingredients. The yeast is the last to add.
  8. Knead the dough into a ball shape. Place in a greased bowl and cover with a wet towel or cling wrap.
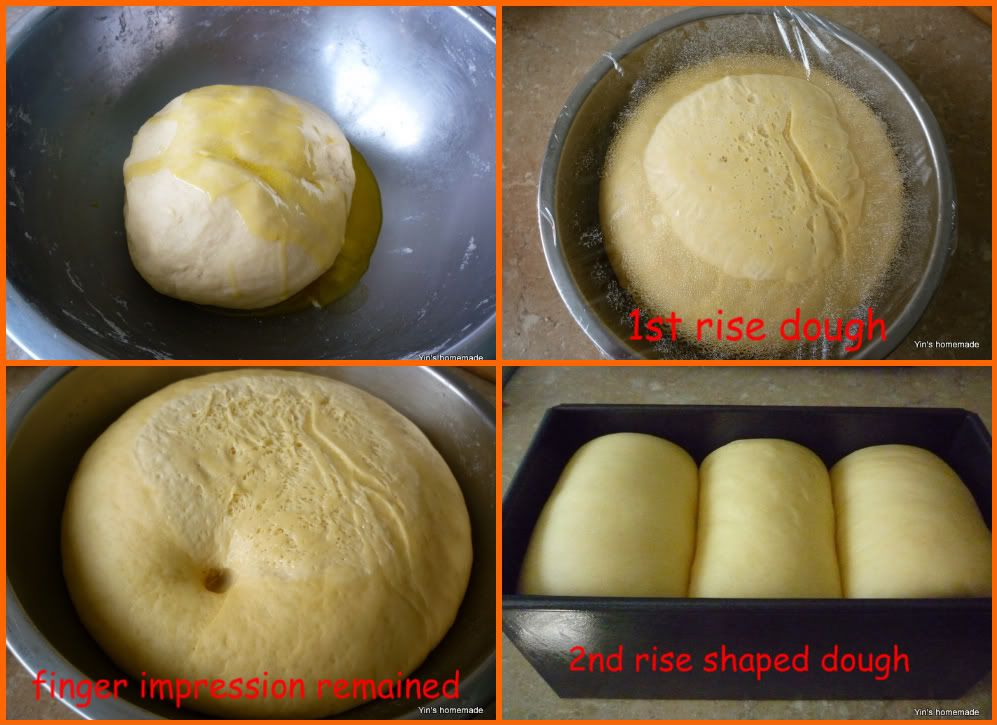
  9. Let it proof till it's doubled in size, about 2 hours. Use finger to test doneness. Poke in and if finger impression remains, this confirms the dough is nicely proofed.
  10. The time will vary and depends on the weather. The best temperature for proofing is 28C. You can place a cup of water in microwave and heat at high for 2 minutes to create a warm spot, once done then place the dough in to proof.
  11. Transfer to a clean floured surface. Deflate and divide the dough into three equal portions. Knead into ball shapes. Cover and let them rest for 15 minutes.
  12. Roll out each portion of the dough with a rolling pin into an oval shape. Fold 1/3 from top edge to the middle and press. Then fold 1/3 from bottom to the middle and press. Turn seal downward. Roll flat and stretch to about 30cm in length. With seal upward, roll into a cylinder. With seal facing down, place in the loaf tins to have the 2nd round of proofing.
  13. Brush whisked egg on surface of dough or lightly spray water on the shaped dough. Bake in a pre-heated 180C (356F) oven for 25 minutes, or until golden brown. Transfer onto a wire rack and let cool completely.

北海道牛奶土司
这汤种面包法也是改编自我喜爱的美食博客基絲汀簡易食譜。牛奶味特别浓厚的超软土司,你会吃不停口!


材料:

A
450 克高筋粉
75 克糖
5 克盐
10克快速酵母(Instant Dry Yeast)
8克奶粉 (增加香味,可不加)
B
60 克全蛋液 (一粒七号蛋)
50毫升牛奶
50毫鲜奶油/鲜忌廉
150 克汤种 (做法参考此食谱,汤种用牛奶替换水)
C
40克牛油(奶油,置室温放软) (待面团起筋,即成团后,才加入)


做法:
面包机做法:
把所有材料(除牛油外)依次倒进面包机(先放湿的材料,然后才放干的材料):牛奶,蛋,汤种,盐,糖,奶粉,高筋粉,最后放酵母。我习惯在面粉中央拨开一小洞,把酵母放进去。
选择面包机的basic功能,材料搞拌至成一面团,就放进已融解的牛油,继续搞拌,成一光滑面团。 测试面团搓到是否合格程度,面团可张开成一薄膜,而且坚韧即成。当面包机停机,等待面团第一次发酵完毕,见面团发大两倍就取出。


手搓麵粉做法:
把所有A&B材料放入一盘中,酵母不直接接触到盐和糖就可以,以免酵母脱水死亡。搞拌至成一面团, 搓成有弹性和筋膜的面团。要有心理准备,面团会很胶粘的坚持搓下去,搓至完全光滑大约15分钟。加入软化的牛油再搓15分钟有至弹性,面团可张开成一薄膜即成。跟着用保鲜膜盖好,作第一次发酵,至面团发大两倍约2个钟头。用手指测试,如果手指戳的印象仍然存在,这印证了面团发得很好。


放在清洁的工作台上,用手按压面团,挤出空气。切割成3个等份,滚圆,收口朝下。用保鲜膜盖着,静置15分钟。用木棍把每个小面团从中央向外滚成椭圆形。从上向下折1/3后,压紧。再从下往上折1/3后,压紧。将收口朝下,把面团上下压长,约30cm,翻面卷成圆柱形。收口朝下,放入面包模中进行最后发酵盖上保鲜膜或湿布进行最后发酵,至两倍大,约60分钟。
涂上蛋汁或轻轻喷一些水,放入预热至180C (356F) 的焗炉中,焗约25分钟,直至转金黄色为止。放在铁架上放凉,即成。

Saturday, March 19, 2011

Hong Kong Style Sausage Rolls 港式肠仔包


Tangzhong bread again?

I was kind of into baking these days as I was trying to clear my pantry as much as possible seeing I have another bag of high grade flour (bread flour) and sugar to get rid of. J

This is the second version of sausage rolls I had made. In the first version, I used sweet bun dough recipe which I extracted from my first baking book by Agnes Chang that I shared here. The following recipe used Tangzhong (Water Roux) method which I adapted from Christine's Recipes. Christine is my mentor in Tanzhong bread making. I had also introduced the same Tangzhong bread making technique in my previous bread making posts for whole meal bread and cottony toast bread.

Again I hand kneaded my bread dough. I was pleased to see the dough nicely doubled after two hours. It gave me confidence to expect a nice batch of fresh breads for dinner that night.

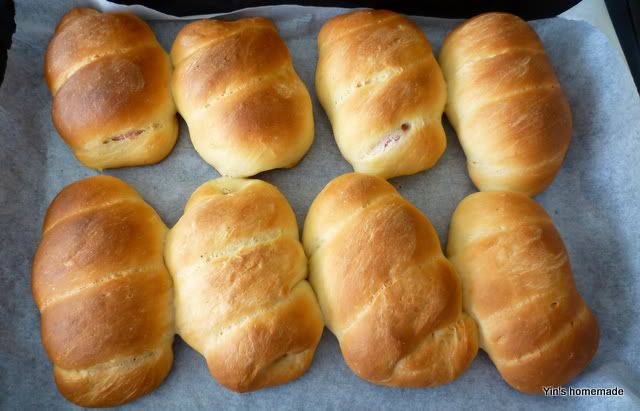
True enough, another batch of soft and fluffily textured sausage rolls out from oven just in time for dinner J
Hong Kong Style Sausage Rolls港式肠仔包
Wanna have a bite? Incredibly cottony-soft bread texture, just yum!


HONG KONG STYLE SAUSAGE ROLLS
Featured in Group Recipe - 19/03/2011


Ingredients

8 Frankfurt sausages or any kind to your liking
A
350 gm high grade flour (bread flour )
55 gm caster sugar
5 gm salt
7 gm milk powder (optional)
5 to 6 gm instant dry yeast
B
1 egg
100-125 ml milk (slowly add in, stop adding if dough too gooey)
120 gm Tangzhong (refer here for making tanzhong)
C
30 gm butter ( softened at room temperature)

Method:
  1. Combine all dry ingredients: flour, salt, sugar and instant yeast in a bowl. Make a well in the center.
  2. Whisk and combine wet ingredients: egg and Tangzhong, then pour into the well of the dry ingredients. Slowly add in milk.  
  3. Knead until you get a dough shape and gluten has developed about 10-15 minutes (hand knead), and then knead in the butter.
  4. If you hand knead like I do, do expect to deal with gooey dough at this stage. You can opt for bread maker if you have one.
  5. Keep kneading until the dough is smooth, not sticky and elastic. The time of kneading depends on how hard and fast you knead. I used to set the timer to 15 minutes to monitor my kneading time.
  6. Test if the dough is ready by stretching the dough with two hands. If it forms a thin "membrane" that's very elastic in texture. That means you have successfully kneaded the dough to a perfect stage.
  7. If you use bread maker then add wet ingredients into bread maker first, then followed by the dry ingredients. The yeast is the last to add.
  8. Knead the dough into a ball shape. Place in a greased bowl and cover with a wet towel or cling wrap.
  9. Let it proof till it's doubled in size, about 2 hours. Use finger to test doneness. Poke in and if finger impression remains, this confirms the dough is nicely proofed.
  10. The time will vary and depends on the weather. The best temperature for proofing is 28C. You can place a cup of water in microwave and heat at high for 2 minutes to create a warm spot, once done then place the dough in to proof.
  11. Transfer to a clean floured surface. Deflate and divide the dough into eight equal portions. Knead into ball shapes. Cover and let them rest for 15 minutes.
  12. Knead each part into a long tube, depends on the length of your sausages. Roll to enclose the sausage, with seals facing down.
  13. Place rolls on a tray lined with baking paper, covered with cling wrap or a wet towel. Leave for the 2nd proofing, about 45 to 60 minutes or until double in size.
  14. Brush whisked egg on surface of rolls or lightly spray water on the shaped dough. Bake in a pre-heated 180C (356F) oven for 25 minutes, or until golden brown. Transfer onto a wire rack and let cool completely.

港式肠仔包
这是我第二种腸仔包做法,第一个我已介绍过用甜面包食谱。这另一种学来的汤种面包法改编自我喜爱的美食博客基絲汀簡易食譜

材料:
香肠8条
A
350 克高筋粉
55 克糖
5 克盐
5至6克快速酵母(Instant Yeast)
7克奶粉 (增加香味,可不加)
B
56 克全蛋液 (一粒蛋)
100-125毫升水/牛奶 (慢慢加入避免面团过湿 )
120 克汤种 (做法参考此食谱)
C
30克牛油(奶油,置室温放软) (待面团起筋,即成团后,才加入)

做法:

面包机做法:
把所有材料(除牛油外)依次倒进面包机(先放湿的材料,然后才放干的材料):牛奶,蛋,汤种,盐,糖,奶粉,高筋粉,最后放酵母。我习惯在面粉中央拨开一小洞,把酵母放进去。
选择面包机的basic功能,材料搞拌至成一面团,就放进已融解的牛油,继续搞拌,成一光滑面团。 测试面团搓到是否合格程度,面团可张开成一薄膜,而且坚韧即成。当面包机停机,等待面团第一次发酵完毕,见面团发大两倍就取出。

手搓麵粉做法:
把所有A&B材料放入一盘中,酵母不直接接触到盐和糖就可以,以免酵母脱水死亡。搞拌至成一面团, 搓成有弹性和筋膜的面团。要有心理准备,面团会很胶粘的坚持搓下去,搓至完全光滑大约15分钟。加入软化的牛油再搓15分钟有至弹性,面团可张开成一薄膜即成。跟着用保鲜膜盖好,作第一次发酵,至面团发大两倍约2个钟头。用手指测试,如果手指戳的印象仍然存在,这印证了面团发得很好。

放在清洁的工作台上,洒点高筋粉。用手按压面团,挤出空气。切割成八个等份,滚圆,收口朝下。用保鲜膜盖着,静置15分钟。把每个面团分别搓成长条形视乎肠仔的长度,把肠仔卷起。如是者,把所有肠仔分别卷好,放在铺了baking paper的焗盘上。盖上保鲜膜或湿布进行最后发酵,至两倍大,约60分钟。
涂上蛋汁或轻轻喷一些水,放入预热至180C (356F) 的焗炉中,焗约25分钟,直至转金黄色为止。放在铁架上放凉,即成。

Saturday, November 20, 2010

Wholemeal Toast Bread 全麦土司 (湯種法) - Featured in Group Recipes


Wanna another slice?

Following my great success in making white toast bread using Tangzhong (water roux starter) method, it motivated me to try on Wholemeal Bread J

Wholemeal Toast Bread 全麦土司 (湯種法) - Featured in Group Recieps on 19/11/2010


I was so pleased to see another successful batch of flavorsome, soft and spongy wholemeal bread coming out from my oven. Ray has been waiting anxiously to try out the bread since he saw me kneading the bread dough last night.

I was flattered when Ray's Nanny commented that the bread tasted so much nicer and softer than the one I bought from the shop J

繼續閱讀中英对照食谱

Wednesday, November 17, 2010

Cottony Toast Bread 波特吐司 (湯種法) - Featured in Group Recipes


Tang Zhong (Water Roux) Bread Making Part 2 – The success

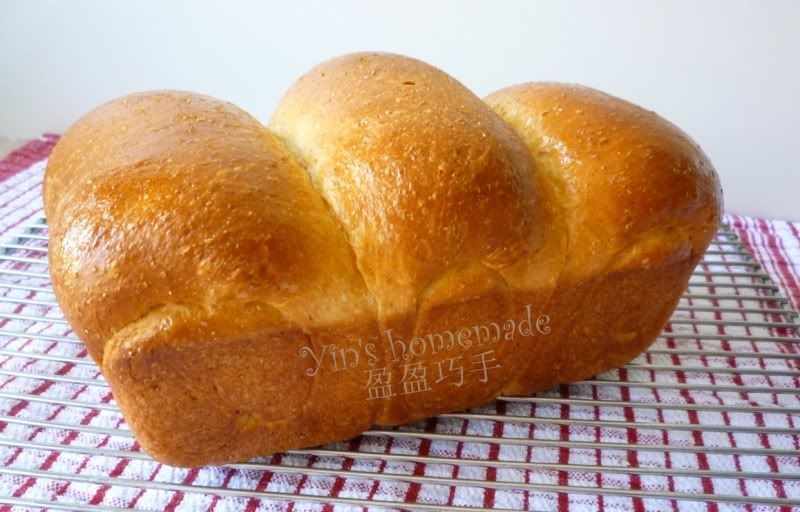
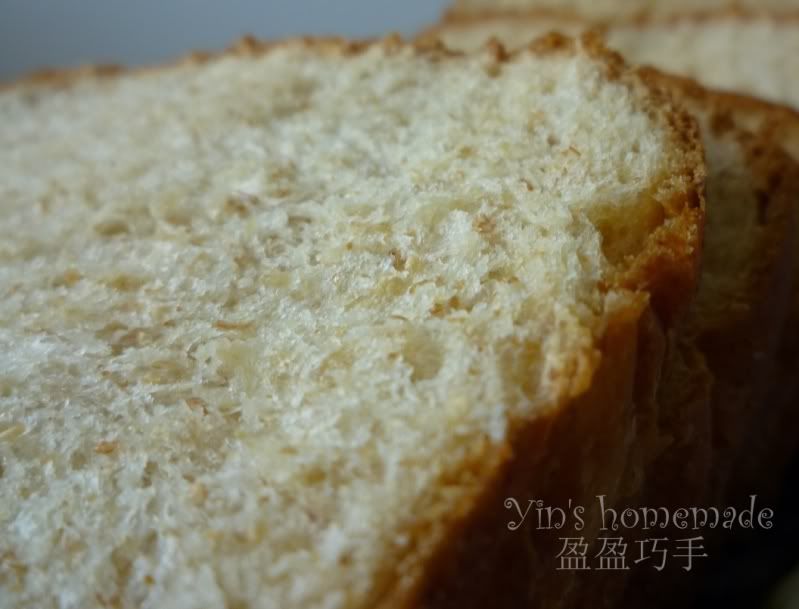
As our old Chinese proverb quotes "failure is the mother of success". I was not held back by the last 3 tumbles I experienced with Tangzhong bread making. I moved on to try out Yvonne Chen's Tangzhong White Toast bread recipe and this time I finally got it right! I felt so contented the moment I sliced open the center of the loaf and revealed cottony, fluffy and spongy texture J


Fluffy and spongy  Cottony Toast Bread 波特吐司 (湯種法)

Cottony Toast Bread (Featured in Group Recipes 17/11/2010)

Compare to the direct bread making method, the dough using water roux method is much stickier. No wonder many suggested using dough mixer to do the mixing and kneading for Tanzhong bread. But, if you like the idea of 100% handmade then you must prepare to stick your hands into gloppy and gooey mess dough. I tried to use wooden spatula to mix the dough as much as possible until the dough was too sticky to move then only I used hands. In my opinion, the final kneading was the most tiring part; I spent 15 minutes to totally blend in the butter to form glossy, smooth and stretchy dough. Overall, it took me about 40 to 45 minutes of hand mixing and kneading time before the dough was ready for it first proof.

This recipe I shared was based on my hand kneading experience; for original recipe using machine kneads you can refer to Christine Recipes of her Tanzhong Hokkaido Milky loaf.

繼續閱讀中英对照食谱

Tuesday, November 16, 2010

Failed Breads

Tang Zhong (Water Roux starter) Bread Making Part 1 – The Failures

After a few successful batches of basic bread recipes, I decided is time to experiment more challenging ways of bread making. This time, I was focusing on how to improve the quality of bread texture especially to maintain the softness of the bread to last for days.

Since I had exhausted learning from my basic bakery book, I seek online help. After Google, I came across on Christine's Recipes introducing Tang Zhong 汤种 (Water Roux starter) way of bread making. Following that, it led me to these two Taiwan bestselling homemade bread making recipe books; first Meng Zhaoqing (孟老師的100道麵包.) and Bread Doctor, by Yvonne Chen (陳郁芬65C 湯種麵包).

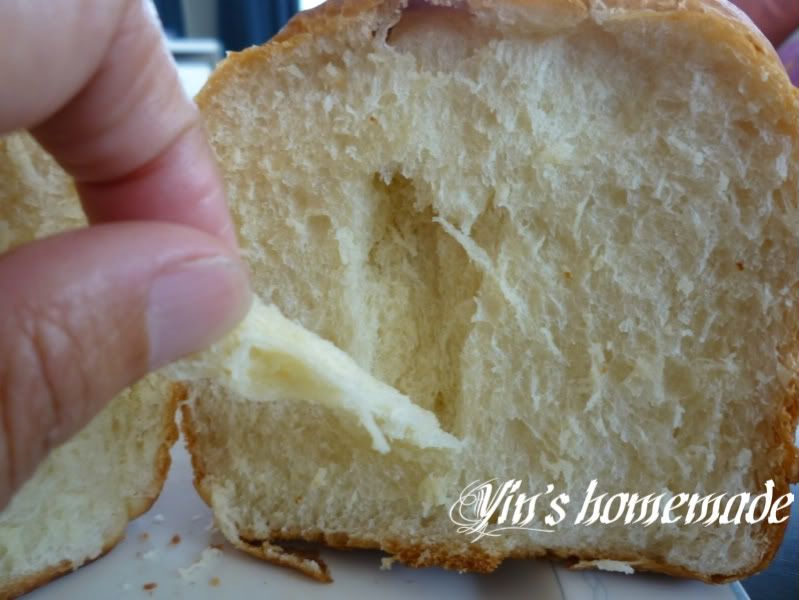
I started off with Meng Zhaoqing's Tangzhong Coco toast bread. The coco bread did come out soft and fluffy but too bad it contained holes. The reasons of bread with holes might due to the air wasn't pressed out when I shaped the loaf or the dough rose to long before I baked it.
Coco Loaf with holes
 
Soft and fluffy texture but with holes
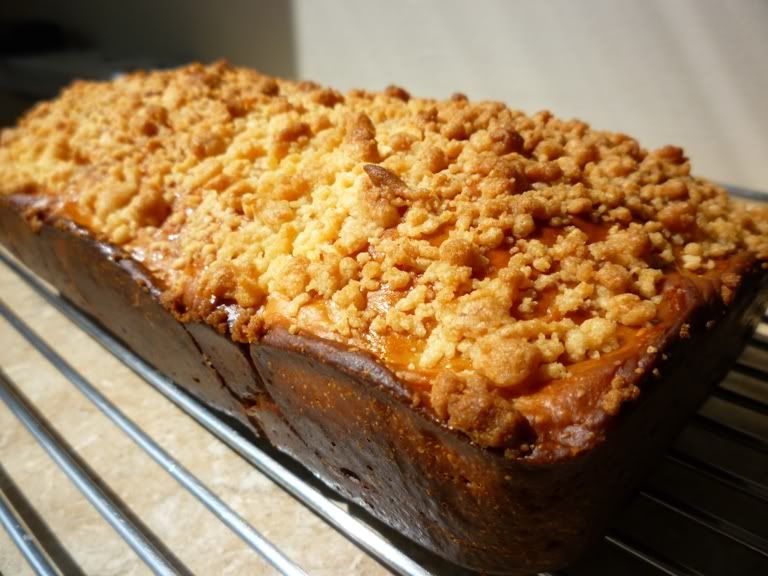
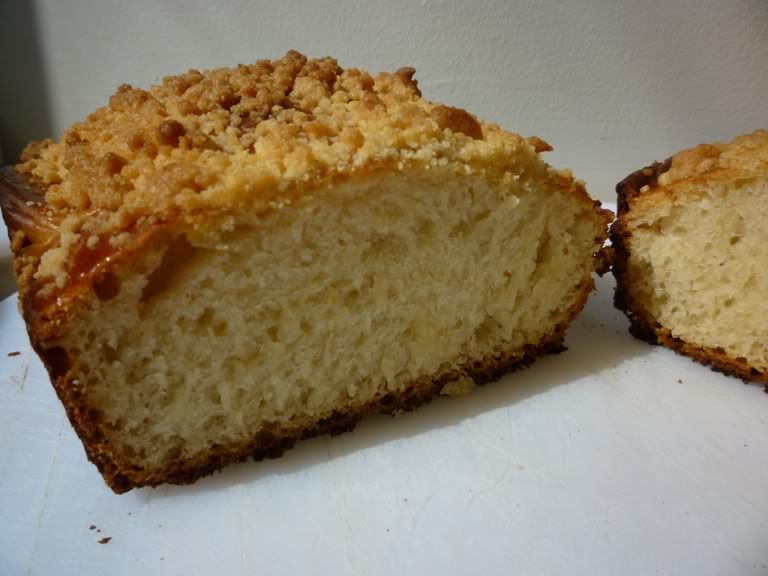
My next try was butter crumble toast which I failed miserably. The bread turned out to be flat (over proof) with stone hard crust (over baked). I had left the dough sitting too long in a heated oven during my second rising process.

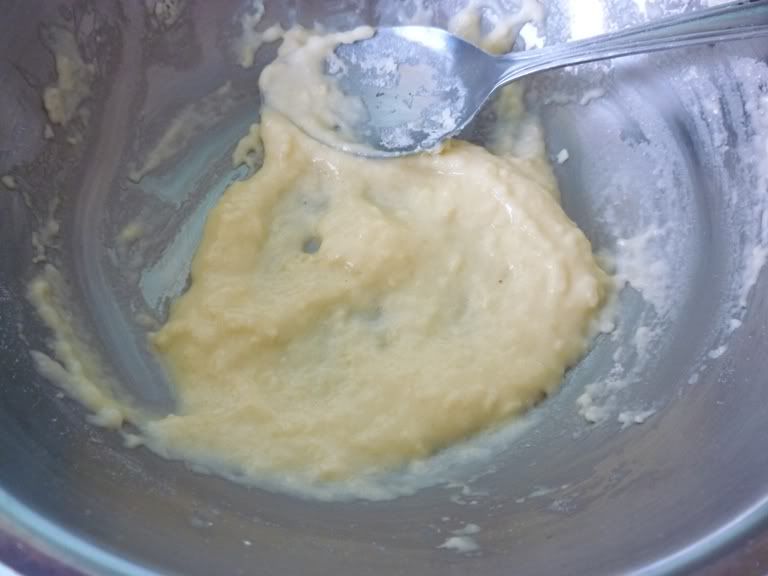
When I did my touch testing on second rise, the dough flatten once I poked my finger in, this clearly indicated the dough has been over risen. I should have punch down and let it proof again but nevertheless I continued baking. Another reason also the Tanzhong I used was too thick and not runny enough.

Flat Butter crumble Toast Bread

The crust was over baked and too hard to eat

Tangzhong (Water Roux starter) - Too Thick

My 3rd Tangzhong challenge was famous Hokkaido Milky Toast Bread recipe by Yvonne Chen. But again it didn't turn out fluffy and cottony as it should be but instead very dense. I guessed this time I did not knead the dough well enough before proofing L

Hokkaido Milky Toast Bread
I do not mind to share my failures, because in my opinion the great way of learning is to learn from mistakes. By highlighting these mistakes, I hope others will not be caught as what I had been thru, am I right?

LinkWithin

Related Posts with Thumbnails