Showing posts with label Cake. Show all posts

Tuesday, February 9, 2016

Easy Banana Cake 香蕉蛋糕

Time flies and in a split second we are now in 2016, the year of Monkey!  Didn't we just have New Year Day yesterday?

I haven’t seemed to have the free time as I thought I would have in blogging even though I quit my 9-5 office work since June 2015. Well, this year I think I need to include blogging as one of my year 2016 resolutions, no more monkeying around!

Today is day 2 of Chinese Monkey year. I would like to take this opportunity to wish all my friends, relatives and readers a prosperous and healthy Monkey year ahead.


To celebrate Monkey year, let’s just bake something with his favourite food - Bananas.

I have been trying out this banana cake recipe for a few times and very pleased with its taste and the simple method used. This recipe was adapted from Agnes Chang “ I can Bake” recipe book.


To have great flavored banana cake, it is best to use ripe bananas. Back in Malaysia, I find among local bananas Pisang Berangan a.k.a. Ang Bak chio, which means “red flesh” bananas in Hokkien with the size about 10 to 12cm long, is best for making cakes when it is fully ripe.


Other than butter cake, this is another popular cake in our family that I used to make for festival and prayer ceremony to my late mother and parents-in-law.

The following was the second version of Banana cake that I have attempted. By adding few table spoons of chocolate hazelnut spread ( Nutella), it became a great Nutella marble banana cake.


Good to have my mischievous helper to help me mashed the bananas.  


Easy Banana Cake

Source: Agnes Chang’s I can Bake

Ingredients: 180g unsalted butter
180g castor sugar ( I reduced to 150g and used brown sugar)
2 eggs
4 ripe bananas, coarsely mashed and mixed with 1 tbsp of lime/lemon juice to prevent oxidation.
1/8 banana essence optional (I used Vanilla essence)
3 tbsp of milk mixed ( I used 6 tbsp)


Dry ingredients :
240g plain flour or self raising flour
1tsp of baking powder
1tsp of baking soda


(You can opt to use self raising flour and to omit both baking powder and soda if using self raising flour)

Methods:
1. Preheat oven to 180°C for 15 minutes. 
2. Lightly grease a loaf tin or line it with grease-proof paper.
3. Sieve flour and set aside.
4. Mix butter and sugar using low speed until well combined. Change to medium speed and beat until light and pale in yellow. (Note: Sugar has not dissolved yet).
5. Add in the first egg, beat well after each addition of egg until creamy.
6. Scrape down the sides for even mixing.
7. Mix in the mashed bananas (add in bananas/vanilla essence and milk at this stage if you are using). Pour in the sifted dried ingredients and mix until well incorporated.
8. Pour the batter into the greased baking tin. Shake and tap on table lightly to distribute cake mixture evenly and to get the air out.
9. Place the cake at the middle rack in the oven.
10. Bake for 45 minutes or until golden brown and cooked. If a toothpick/skewer comes out clean, it is done.
11. Remove it from the oven and leave the cake in the tray to cool on the rack for 5 minutes before removing from tray.

Notes: If the cake turns brown too quickly, cover it loosely with a piece of aluminum foil towards the last 15 minutes.


香蕉蛋糕
资料来源:蓝赛珍,我会烘焙

材料: 牛油180克 白砂糖 - 180克 ( 我用150克黄糖) 全蛋 2个
4条成熟的香蕉,​​捣碎,加入1汤匙柠檬汁防止香蕉氧化变黑

1茶匙香草精 鲜奶 3汤匙  (我用4 汤匙) 低筋面粉250克(过筛) 发粉 1茶匙 (过筛) 苏打 1茶匙 (过筛) (您可以选择使用自发粉,如果采用自发面粉省略这两个发粉和苏打粉)
 

做法:
1. 烤箱预热至180℃。最好先预热15分钟
2. 将 烤盘抹油或置油纸。面粉过筛。
3. 使用低速 将牛油+细砂糖一起混合搅拌,换到中速打至松发变白。
4. 在糖还没有完全溶解,倒入第一个鸡蛋液后继续搅拌,每次加蛋奶油完全吸收蛋液后,再加入蛋液搅拌至蛋液搅拌完毕。再加入香草精拌匀。
5.加入捣碎的香蕉(在这个阶段加入香蕉/香草精)。倒入过筛的面粉干配料混合,再加入牛奶拌匀。
6. 把香蕉面糊倒入抹油的烤盘。在桌子上轻轻地震动和敲击烤盘使蛋糕混合物均匀分布​​,并让空气排出。
7. 将烤盘放进烘箱中的下架。烤45分钟或至金黄色。 用牙签/串以测试,串出来干净,它已熟。
8. 从烘箱中取出,让烤盘冷却5分钟后才除去烤盘倒出蛋糕。

注意事项: 如果蛋糕表面过焦,最后15分钟可在面蛋糕覆蓋一張鋁箔紙。


Friday, September 12, 2014

Mrs NgSK’s Butter Cake 牛油蛋糕


Butter cake again ? Recipe #3

Following up from my previous post, here I am introducing another great butter cake recipe from a blog which I came across while I was researching on butter cake recipes.

I was glad that my trial turned out successful. The cake tasted really soft and moist as claimed by the blog post. The main difference of this recipe as compared to the last 2 recipes I blogged before was this recipe required the egg whites and yolks to be separated and to beat the white and sugar into stiff egg white. More skill was needed to make this cake as stiff egg white was not easy to make.


P1000604

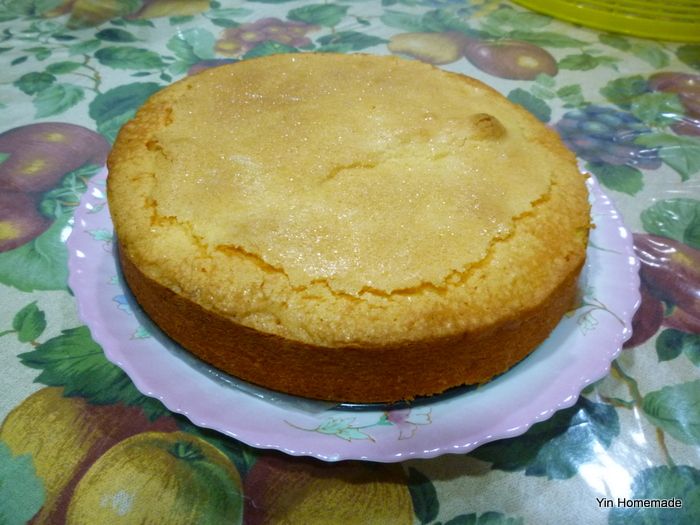
Crack free butter cake Smile

P1000605

P1000606

P1000618

I baked this cake for my late mother-in-law’s passing anniversary jìrì () prayer ceremony. Besides this cake, I also made my signature dish roasted pork belly while Auntie Lan made rice dumpling ( Bak Chang). It was a sumptuous lunch for her.

Collage 2014-08-03 12_32_40

Mrs Ng SK's Butter Cake

The recipe adapted from Wendyinkk's blog. This butter cake recipe originated from one of the church members of Mrs Ng SK.

Ingredients

  • 230g Butter ( I used the whole butter 250g)
  • 150g Caster Sugar
  • 4 eggs ( about 200g), separated into whites and yolks
  • 200g sifted self-raising flour
  • 60ml milk
  • 1 tsp. vanilla essence
  • 50g caster sugar

Instructions

  1. Preheat oven to 180 C for at least 15min, line the base of 8” baking pan with parchment paper and grease the sides of the baking pan.
  2. Cream butter, sugar and vanilla at medium speed till pale and fluffed up.
  3. Add in egg yolks, one at a time making sure it's well mixed before adding the next.
  4. Add half of the flour, mix at slow speed. Add in milk, mix then the remaining flour.
  5. In a separate bowl, whisk egg whites with 50g caster sugar till soft peaks.
  6. Scoop ⅓ of the egg white into the batter, and mix it thoroughly, to lighten up the batter.
  7. Add in the remaining egg whites and fold it in with a spatula.
  8. Pour into the lined baking pan and level.
  9. Place in the middle rack of the oven, bake for 45 minutes at 170 C
  10. Lower the temperature to 150C at last the 15 minutes if you see the top is too brown, or using a aluminum sheet to cover the top.
  11. Using a skewer to check doneness of the cake by poking into the center of the cake, if it's cooked, the skewer comes out clean.

    牛油蛋糕

    改编自Wendyinkk的博客的配方。这奶油蛋糕配方源自她的教会成员之一。

    成份 :

    230克牛油(我用250克) 150克砂糖, 鸡蛋4个(约200克) ,分为蛋 白和蛋黄, 200克过筛自发面粉, 60毫升奶, 1茶匙香草精, 50克砂糖

    做法:

    1. 烤箱预热至170℃。最好先预热15分钟

    2. 将烤箱预热至180℃15分钟, 可减少至170, 烤盘抹油或置油纸。

    3. 使用低速将牛油+细砂糖一起混合搅拌,换到中速打至松发变白。

    4. 在糖还没有完全溶解,倒入第一个蛋黄后继续搅拌,每次加蛋奶油完全吸收蛋黄后,再加入蛋黄搅拌至蛋黄搅拌完毕。再加入香草精拌匀。

    5. 面粉划分为二分次拌入,鸡蛋奶油里最低速度搅拌混合 最后,加入牛奶拌匀。

    6. 在另一个碗,搅拌蛋清和50克细砂糖,搅拌至软峰 即蛋白膏的峰尖挺立不下垂并硬性发泡。舀蛋白膏分为三次拌入面糊中调匀了。

    7.把面糊倒入抹油的烤盘。在桌子上轻轻地震动和敲击烤盘面糊均匀分布​​,并让空气排出。

     8.将烤盘放进烘箱中架。烤45分钟或至金黄色。 用牙签/串以测试,串出来干净,它已熟, 从烘箱中取出,让烤盘冷却5分钟后才除去烤盘倒出蛋糕。

    注意事项:
    如果蛋糕表面过焦,最后15分钟可在面蛋糕覆蓋一張鋁箔紙

    Wednesday, August 27, 2014

    Butter Cake 牛油蛋糕

    Butter cake recipe # One

    For many baking rookies, this seem to be one of the basic cakes to try out with right? I was one of them. However, I soon found out that this cake was not as easy as it may have seemed to be rated by most of the recipes.

    When baking butter cake, I bet many of you might experience one or both of the following problems, which to me was really demotivating.

    1st – Why my butter cake taste dry?
    So far, I had attempted 3 times, with 3 different types of butter and experienced 3 different consistency of moistness.  Apparently, to yield a moist buttery butter cake, the key is very much depending on the type of butter and liquid used in the recipe.

    2nd – Why my butter cake crack in the middle? So far, out of the 3 trials, only the recent birthday cake that l made for my son turned out with perfect flat and smooth surface. In my previous two attempts, the cakes cracked miserably in the middle like an earthquake. So, what did I do in my recent trial that made a difference from the previous ones? For this trial, even though I did use a different recipe but I believed the key change was more of using a round cake pan rather than a loaf pan, which I happened to use for my previous 2 butter cakes.

    Thanks to Joy of Baking that helped to solve my mystery. In her blog, she pointed out most cakes baked in loaf, bar or ring pans crack slightly due to the confined space. Hence, if smaller cake pan is used, it is much easier for the cake to rise and crack in the center. In addition, oven temperature also plays an important factor - too hot an oven temperature causes the cake to peak faster in the middle and erupt, resulting in cracks.

    To avoid too hot an oven, it is best to bake with lower temperature in the beginning ( around 160/170 degree Celsius) and adjust placement of the cake to bottom rack of oven instead of the middle rack to make the top brown slower than the sides.

    The following were the loaf butter cakes I made comparing to the one bought in a store. Both had the same crack effect in the center. I baked these 3 loaf of butter cakes in April during Qīngmíng festival (清明節) prayer to pay honour to my late mother and parents-in-law.

    buttercake_collage

    Initially, it was disappointing seeing the cracked cakes came out from the oven. However, when my family members especially my father who tasted the cake and praised highly its moistness and buttery taste with positive comments that the cake was tastier than those from the store, I felt so much relieved!clip_image001[4]

    This butter cake recipe is adapted from Agnes Chang's Baking Made Easy, (蓝赛珍,轻轻松松学烘焙) but I added more milk in the recipe to give it more moisture. For this recipe, I used Buttercup brand butter which was not really butter but margarine. I was surprised that the cake turned out to be as moist and buttery as a branded butter.

    Last month 14th of July, in celebrating my son’s 10th birthday, I did another attempt by using an expensive branded butter, SCS butter. This time I opted for a different recipe, adapted from Christine’s Recipes Butter Pound Cake. Click the link to access this recipe directly from her famous food blog.


        roundbuttercake_collage

    I was pleased to see a crack free round butter cake. clip_image001[6]However, my family felt that the taste of this cake was drier and not as moist as my previous butter cake. I was not sure whether it was due to the change of recipe or the butter that I used. 

    Thanks to hubby’s great calligraphy writing skill that transformed this plain looking butter cake into a nice looking birthday cake. clip_image001[7]


    raycutcake10thbd_collage

    Shared below is the butter cake recipe adapted from Agnes Chang’s Baking Make Easy.

    BUTTER CAKE

    P1000501


    Source: Agnes Chang’s Baking Make Easy

    Ingredients:
    250g butter, at room temperature
    250g self rising flour
    200 -250g castor sugar ( I reduced to 180g)
    4 eggs
    4 tbsp. fresh milk ( I added 6tbsp.)
    1 tsp. vanilla essence
      

    Methods:
  1. Preheat oven to 180°C for 15 minutes. ( I reduce to 175)
  2. Lightly grease a 22cm round baking tin or line it with grease-proof paper.
  3. Sieve self rising flour and set aside.
  4. Mix butter and sugar using low speed until well combined.
  5. Change to medium speed and beat until light and pale in yellow.
  6. (Note: Sugar has not dissolved yet).
  7. Add in the first egg, beat well after each addition of egg until creamy.
  8. Scrape down the sides for even mixing.
  9. Add in vanilla essence and mix well.
  10. Divide flour into three portions, use lowest speed to mix in flour.
  11. Scrape down sides for even mixing.
  12. Finally, add milk .
  13. Pour the mixture into the greased baking tin.
  14. Shake and tap on table  lightly to distribute cake mixture evenly and to get the air out.
  15. Place the cake at the lower rack in the oven.
  16. Bake for 45 minutes or until golden brown and cooked.
  17. If a toothpick/skewer comes out clean, it is done.
  18. Remove it from the oven and leave the cake in the tray to cool on the rack for 5 minutes before removing from tray.

  19. Notes:

  20. If the cake turns brown too quickly, cover it loosely with a piece of aluminum foil towards the last 15 minutes.
     
  21. 牛油蛋糕


    资料来源:蓝赛珍,轻轻松松学烘焙


    材料:
    牛油250克
    白砂糖 - 180-200g
    全蛋 4个
    低筋面粉250克(过筛)
    发粉 1茶匙 (过筛)
    鲜奶 4汤匙
    半茶匙盐
    1茶匙香草精


    做法:

    1.     烤箱预热至180。最好先预热15分钟

    2.     将烤箱预热至18015分钟, 可减少至175 烤盘抹油或置油纸。自发面粉过筛。

    3.     使用低速 将牛油+细砂糖一起混合搅拌,换到中速打至松发变白。

    4.     在糖还没有完全溶解,倒入第一个鸡蛋液后继续搅拌,每次加蛋奶油完全吸收蛋液后,再加入蛋液搅拌至蛋液搅拌完毕。再加入香草精拌匀。

    5.     面粉划分为三分次拌入,鸡蛋奶油里最低速度搅拌混合 最后,加入牛奶拌匀。

    6.     把混合物倒入抹油的烤盘。在桌子上轻轻地震动和敲击烤盘使蛋糕混合物均匀分布​​,并让空气排出。

    7.     将烤盘放进烘箱中的下架。烤45分钟或至金黄色。 用牙签/串以测试,串出来干净,它已熟。

    8.     从烘箱中取出,让烤盘冷却5分钟后才除去烤盘倒出蛋糕。


    注意事项:
    如果蛋糕表面过焦,最后15分钟可在面蛋糕覆蓋一張鋁箔紙。


    Wednesday, September 18, 2013

    Easy-to-make Snow Skin Mooncake

    Happy Mid-Autumn Festival
    Mid-Autumn Festival is just around the corner on 19th September 2013. Are you busy looking for some simple recipe for mooncake? Well, try this really simple Snow Skin Mooncake recipe! Snow skin mooncake tastes similar to Japanese Mochi.
     As a follow up to my previous blog post featuring traditional Snow Skin Mooncake recipe obtained from my good friend Helen, here’s another variety adopted from Y3K cookbook which is so easy and the result is so presentable that a novice cook can easily impress!  P1110736
    Only 4 major ingredients are needed for this recipe - cooked glutinous rice flour (Gao Fen), icing sugar, shortening and water. In addition, don’t forget to get one cute little mooncake mould to make your favourite shape. This year, I bought myself another small mini square mooncake mould.

    However Auntie Lan commented that it was best to use round-shaped mould, so as to symbolize reunion/unity, as in the case of the big round full moon in this mid autumn evening “月圆人团圆”

    snowskin _mooncake collage

     If you wish to have a more authentic version of the homemade mooncake, you can also try to make your own fillings such as Taru/Yam paste, mung bean paste, red bean paste which I introduced before. Click on the links to get to the old blog posts for the recipe.

    P1110750
    Coconut Milk Mung Bean paste filling

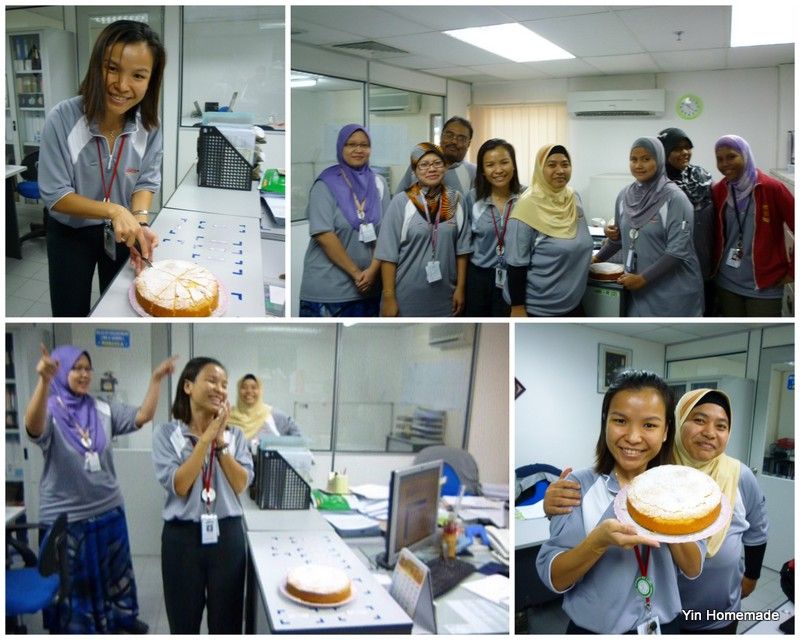
    I had shared these mini mooncakes with my colleagues in the office.


    Sunday, July 28, 2013

    No Bake Chocolate Ganache Cheesecake 免烤巧克力芝士蛋糕

    My boy turned 9!

    14th July 2013
    I just can’t believe my darling boy has turned 9!  Last month, he attended one of his classmates’ birthday party and his classmates had asked him to organize the same for his birthday too. He came back with this request. I was happy to support his suggestion and even promised to make him a birthday cake. However, his dad was reluctant with the idea of kids running around our house and the hassle of tidying up the aftermath. He later suggested throwing a small water splashes party at our golf/swimming club which was just 5 minutes away from our house instead. This win-win idea turned out to be a blast. Ray invited 4 of his close school buddies over and at the end of the birthday party; all of them rated this event as one of the best birthday parties they had ever attended. They gave a big thumb up for the great fun at the pool and the water guns we bought for each boy.

    Frankly speaking, compared with bread baking, I was still pretty amateur in cake baking. But not to disappoint my boy, I needed to try my best and honour my word.  Knowing Ray loved chocolate and ice cream, I opted for the easy “no bake” cheesecake instead. I wrote to my good friend, Helen in Auckland for help.  She was the master that had taught me baking when I resided in Auckland. Her recipes were mostly idiot proof. Do check out the recipes that I attempted before, Lemon Cheesecake, Tiramisu and Moon Cake. I was thankful to her; she came back promptly to my request as she just did the same birthday cake for her daughter a month ago.


    No Bake Chocolate Ganache Cheesecake 免烤巧克力芝士蛋糕
    As you could see, the cake was not perfectly done. I had 2 failed attempts in the process of making this cake.  This was my first trial in making ganache.  I was hoping to have a smooth silky ganache but the cake ended up with bubbled surface and the ganache was not set enough to firm even after more than 3 hours of freezing in the fridge.
    
    
    Ganache
    Later, I did some checking and realized that part of the reasons why the ganache did not firm up was possibly due to the un-boiled fresh cream. I should bring the cream to boil for a minute or more to help reduce the water content in the cream and to break up the protein strands. Emulsified sauces combine better when the amount of water is reduced. I then recalled that I was pouring cold cream into melted chocolate instead of boiling the cream before adding it to chopped chocolate.  That was the first failed attempt.
     
    Chocolate transfer sheet walls
     The second failed attempt the use of chocolate transfer sheets to decorate the edge of the cake.  Again, I failed to get the chocolate to firm up to tear the plastic sheet out from the chocolate coating. Not to ruin the cake presentation and for the sake of photo taking, I left the plastic sheet around the cake and only removed it when we wanted to cut the cake. However, I was relieved the cake was not completely a failure. Hubby did a great job in piping words onto the cake and we got the cake nicely decorated with Ray’s name.

     
    Initially, I was really disappointed with the cake, but when my boy told me the cake was what he liked most out of all the food served that evening. I was over the moon! With that statement I rated the event “Mission Accomplished”! :-)

    They say “don’t judge a book by its cover”.  This seems describe well this occasion.  The frozen cheesecake did taste really yummy despite my poor cake decoration skill!
    Delicious Chocolate Cheesecake

    Saturday, September 29, 2012

    Mung bean Paste 綠豆蓉餡


    HAPPY MOONCAKE FESTIVAL 中秋节快乐!
    mooncake
    In advance of the mid autumn festival (a.k.a. mooncake festival) tomorrow,I would like to take this opportunity to wish all my friends, relatives and readers a happy moon cake festival and happy reunion with your family.
    To the Chinese, especially those staying away from their home town, the mid autumn festival (八月十五中秋节)is a big day for them to rush back to get together and celebrate with family members. The Chinese believe full moon symbolises reunion (月圆庆团圆).
    This year, I had made both types of moon cakes, traditional baked moon cakes and snow skin moon cakes. (Click to access my old posts on moon cake making).
    I had made 3 types of fillings which were Taro paste, red bean paste and mung bean paste. For the first two, I had already covered in previous posts. Just click on the words to lead you to the posts.
    I brought these moon cakes and shared with my colleagues in the office a few days ago:
    2012mooncakemaking
    In conjunction with this happy occasion, I’m going to introduce another traditional moon cake fillings that I had used for my homemade moon cakes this year – Mung Bean Paste.
    Mung bean is more widely known as green bean in South East Asia. As the name suggests, they are green in colour but when their skins are removed, Mung beans are light yellow in colour.
    P1090586
    Mung Bean 綠豆

    When these green beans are left to germinate and grow in water for days, they become “bean sprouts”, a type of vegetable that is commonly used for stir-frying, salad and soup in many Asian cuisine.
    Check out my old post of Stir-fry Bean Sprouts with Prawn cutlets 豆芽炒虾球 this is a super fast and easy stir fry vegetable recipe.

    Similar to red beans, Mung beans are also widely used in Chinese cuisine especially as dessert filling when made into paste form.
    For the recipe I shared, I didn’t specify the measured quantity in details but merely sharing the major ingredients.  Usage ratio is very much depending on the flexibility of own taste preference.
    The result of my mung bean paste was a bit dry and crumby. To have a finer texture I recommend to blend it further with a blender just like the red bean paste method. If you wish to have creamier and more flavourful texture, I recommend to substitute water with milk or coconut cream but for weight watchers it's better to stick to water.Smile

    P1090590
    Mung Bean Paste 綠豆蓉餡

    Saturday, September 8, 2012

    Palm Sugar Steamed Cake 椰糖马来糕


     24th August 2012 marked the 8th day of the 7th month in the Lunar calendar and was my late mother in law’s 4 years passing anniversary.  To commemorate that, Auntie Lan reminded us to pay respect by making a lunch meal as prayer offering at home.
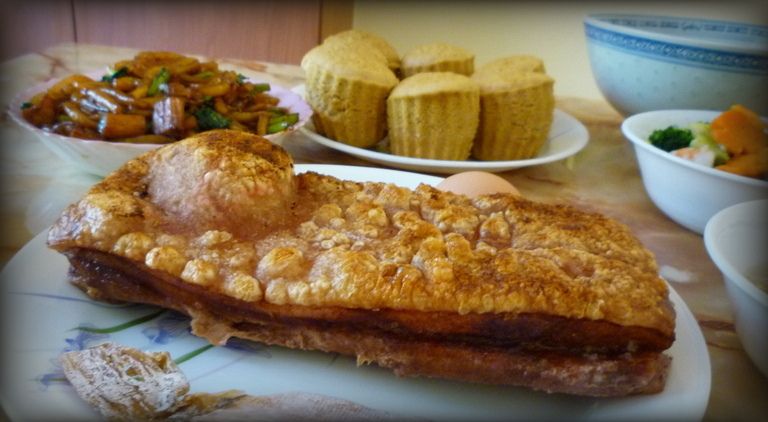
    With a week-long Raya break at home not going anywhere, I offered to make cake and my signature dish Hong Kong Style Crispy Roasted Pork Belly as part of the offering.  As I remembered my late MIL loved eating roasted pork.
    HK style Crispy Roasted Pork Belly
    The following steamed cake is a type of Malay Kuih/cake which is similar to Chinese “Huat Kuih” (发糕) commonly served in Chinese prayer offering. 

    Palm Sugar Steamed Cake 椰糖马来糕

    Palm sugar, also called Gula Melaka in Malaysia is a type of sugar made from palm tree. In Malaysia, this dark chocolate colored sugar is usually sold in a solid log form and the Malay loves to use it as sweetener to their dessert.


    Tuesday, July 24, 2012

    Dinosaur Cake 恐龙蛋糕

    Dear Ming Ray,

    Happy belated 8th Birthday!

    Where has time gone? I just couldn’t believe we had just celebrated Ming Ray’s 8th birthday last week! It felt like it was just yesterday when I still had him in me.  Flashing back to the day of Ming Ray’s birth on the 14th July 2004, I can vividly recall the more than 6 hours labour agony ending in a forced C-section because of baby’s heartbeat dropped drastically on every contraction. The labour process was awful to remember, but meeting my first born little baby boy for the first time was a moment no words could ever describe and now he is 8.  It didn't seem at all that long ago when he was just a thought...a wish.
    Ever since I indulged myself in baking, I had always wanted to bake a cake for his birthday. In fact this dinosaur cake was long overdue, I saw this fantastic Dinosaur cake idea last year from Betty Croker website via YouTube but at that time we just moved back from Auckland and had yet to settle down.  That, plus the house renovation work didn’t make the right opportunity to bake for him.
    Like many other kids, Ming Ray loved dinosaurs since he was baby.  Any item related to dinosaurs attracts him. I couldn’t recall how many times he had watched the series of movie Jurassic Park over and over again; I guess it is very common that boys like dinosaurs.
    In fact he had designed a very creative dino cake box for his Auckland School's garage sales which I shared in my previous muffin post back in 2010. Check it out here.
    I was glad I managed to fulfil my promise to him to make an icing sculptured dinosaur cake. However, I must thank hubby for helping to decorate the cake.  Without his fine touch I supposed I would end up with a flop project as I was struggling with the icing to make volume to the body of the dinosaur cake. The icing I made was a bit too runny hence it was difficult to lay and shape on the cake.

    We had a small birthday party with another close friend of ours whose children were also Ming Ray’s buddies.  I felt so happy and relieved when the kids said the cake was yummy!
    Yes! Mission accomplished!

    Sunday, May 13, 2012

    Madeira cake 马德拉蛋糕

    Classic English Cake

    When I found out our newly recruited HR manager was going to celebrate her birthday on Sunday, 29th April, I decided to make her a birthday cake to share it in our Friday morning tea meeting in conjunction with the welcoming of her joining the company.

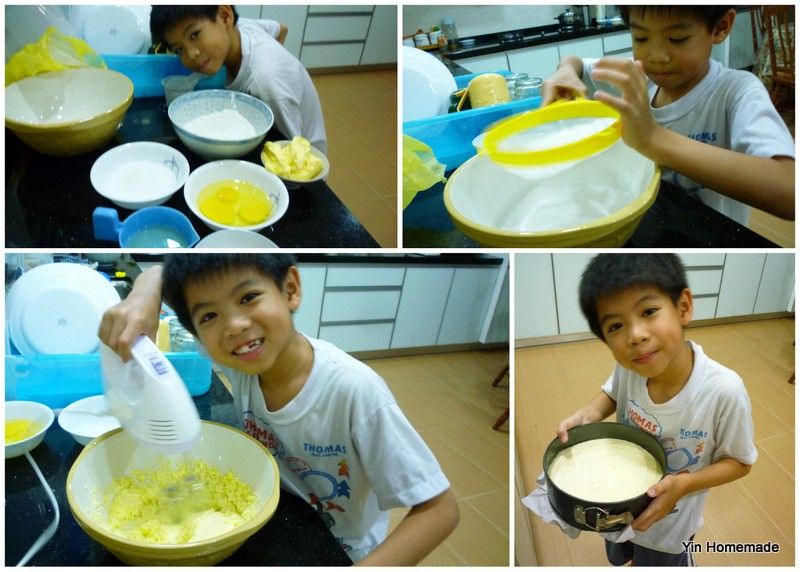
    However, given the short notice and a week day, I didn’t have much time to prepare in the evening after work.  Eventually I chose to make a simple and easy cake. I was pleased Ray offered a helping hand that night and we had a fun bonding time in making the cake together. 
    My handsome kitchen helper
    Flipping through recipes, I came across this lemony and buttery Madeira cake. Following the Victoria Sandwich I made earlier, this was another classic and simple to make English sponge cake. This cake was traditionally consumed with a glass of Madeira wine, where the name of the cake originated from. Nowadays it is good to go with a cup of tea too.

    This cake took longer baking time than usual, about an hour at lower temperature of 160 degree Celsius. Initially, when I saw the cake with cracked surface, I thought it was yet another failed project.
    The next morning, I did some google search and was relieved to learn that it was normal for Madeira cake to have peaks and crack on the surface.  I found the cake texture to be very light and a bit dry. It is no wonder the English like it to go with Wine.

    I was wondering if I should increase the portion of butter or reduce the baking time for my next trial.
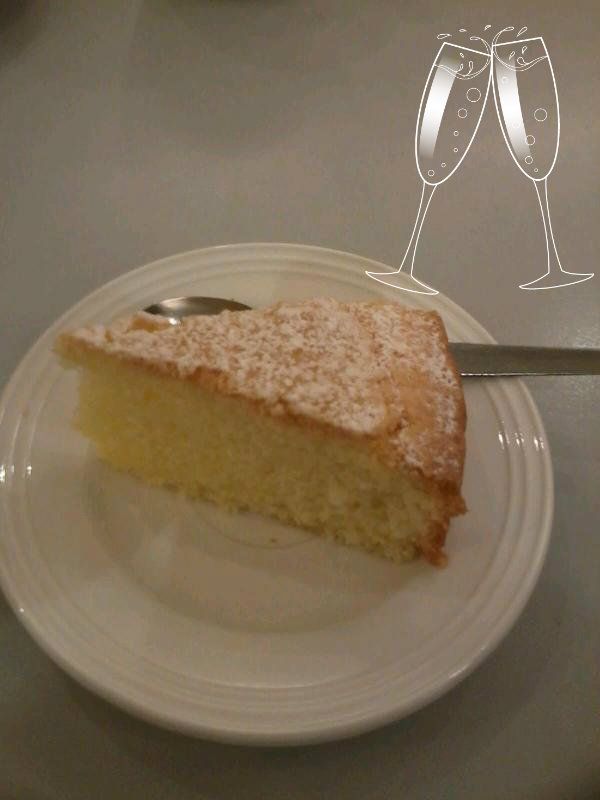
    Madeira Cake
    I was glad the birthday girl Sandee liked the cake; we had a small celebration at her office before sharing with the rest of the managers in our morning tea meeting.
    Happy birthday Sandee

    Saturday, April 21, 2012

    Victoria Sandwich 维多利亚三明治蛋糕

    Pandan Victoria Sandwich

    Victoria Sandwich is one of the classic English tea time treats. From the name you can easily guess it must be named after Queen Victoria, who favoured a slice of this sponge cake with her afternoon tea. 
    I adopted this cake recipe from Agnes Chang “ I can bake”.  You can have many variations by substituting the spreads with various kinds of fruit jam.
    In conjunction with my Pandan series, for this first try, I made Victoria Sandwich in Pandan flavour, spread with my fresh homemade Pandan kaya (Coconut Egg Jam in Pandan flavour) , made earlier in the morning.

    If you are keen to learn to make homemade kaya just click on the name to bring you to my old post on homemade kaya using microwave method which was faster and easier than the traditional way of kaya making.
    Homemade Pandan Kaya (Coconut Egg Jam in Pandan flavour)
    I brought the sandwich to the office and shared it in our office morning tea meeting. J

    Sunday, September 11, 2011

    Taro/Yam Paste Fillings 芋头馅料

    Happy Moon Cake festival !
    Next Monday in lunar calendar is 15th of the 8th month which marks a big day for the Chinese celebrating the Moon Cake Festival or Mid Autumn Festival 中秋节.  For those Chinese who celebrate this big occasion, moon cake is the main bakery product not to be missed. Moon cake is analogous to turkey for the Thanks Giving day or Christmas Day.
    Since two months ago, I started to see assorted moon cakes ranging from traditional flavor Lotus paste moon cake to western flavor Cheesy Choc Oreo flooding the local market. Rather than the wide variety of fillings of the moon cakes, I was more attracted to their elegant and stylish moon cake boxes instead. These gift boxes are getting so much more ornamental to the point that they now become the deciding factor for the purchase rather than the delicacy element! These moon cakes were not sold cheap in the market.  I reckon a huge portion was attributed to the glossy packaging cost.
    
    2 weeks ago, I started to make my first batch of homemade traditional baked moon cake 广式月饼. I used the same moon cake recipe given by Helen, one of my best cooking pals in New Zealand.  She shared that recipe with us when she demonstrated the making of homemade moon cake at my ex-Auckland home last year. Do click here for the recipe I posted last year.  


    I was glad that it was much easier to find the necessary moon cake ingredients and mould in Malaysia. I got these moulds cheaply from a bakery supplies shop just minutes away from my house.

    Last week, I made another batch of moon cakes, this time I tried out snow skin moon cake冰皮月饼 . This type of chilled moon cakes was much easier to make, no baking required. I opted for an easy way out by using a pack of readily mixed snow skin flour and by merely adding water and shortening, the skin dough would be ready. 
    

    If you wish to make your own snow skin dough, click here for the recipe shared by Helen also. This time, I decided to make own moon cake fillings.  The following was the taro/yam paste fillings adapted from moon cake making video by Agnes Chang.    
    I shared both types of my homemade moon cakes with my colleagues and I was pleased to receive good comments from them. The best voted mooncake was snowy moon cake with taro and melon seeds fillings ! J

     
    I would like to dedicate this post to all my TWOA level 3 computing and cooking members: Alice, Doris, Helen, Jane, Jenny Wu, Jenny Yip, Julie, Lily, Linda, Vera, Penny, Julia and Ellen.

     
    “I really miss those happy moments we had; taking turns to host the cooking and lunch sharing functions every Thursday. With this moon cake I would like to wish you all “
    A Happy Moon Cake Festival! 祝你们中秋节快乐!

    LinkWithin

    Related Posts with Thumbnails