Showing posts with label Desserts. Show all posts

Friday, October 2, 2015

Japanese Light Cheesecake (日式芝士蛋糕)


I have attempted two cheesecake baking experiences in the past, using the recipes from well known cook books that I have. However, I was disappointed to note that both attempts were not successful.

On both occasions, the cakes I made failed with poor cake appearances, either with cracked surface or sunk/collapsed center. Since then, I have given up cheesecake baking and only work on non-baked cheesecakes.

Not until recently when I was back in Penang, my good buddy YL bought me a new cake mold that inspired me to give it another try.

This time, knowing YL who was also a keen baker herself specializing in cheesecake baking; namely durian cheesecake, I sought her advice to learn her secret of success. She generously shared her customized recipe with me to give it another shot.

So, this time guess how did it go?

Even though with limited baking utensils and using a much smaller and unfamiliar oven in my sister-in-law’s ( SIL), LC’s kitchen….

Nonetheless, this was what came out from the oven….

Yes! I finally nailed it !

IMG_20150916_085614

Hurray! I had a crack free and collapse free cheesecake!

IMG_20150916_091738


However, there was a minor flaw with the cake texture. It was slightly damp at one of the corners at the bottom of cake.

This was because one of the corners of the mold was leaking and the aluminum foil I used was not double layered. I also didn’t firmly wrap the bottom of the baking mold. In the end, it resulted in some water sipping into the bottom layer of the cake and causing a damp corner.

From the recipe, I noticed the difference of the recipe was the flour content. She used very little flour in her recipe. In addition, corn flour was added in it too!  Chiffons method was used by whisking egg whites into soft peak then only mixed well with the cream cheese batter creating a light and fluffy effect. No wonder the cake was not dense and felt lighter.

I made this cake on September 16th (916) Malaysia day.  I was overwhelmed to see the cake come out perfectly. With my dad’s birthday falling on the same day, this cake was just nice to be used to celebrate his 85th birthday this year.

IMG-20150922-WA0024

Thank God my dad liked and enjoyed eating the cake very much. I was on cloud nine with his compliments on the taste and appearance of the cake being better than those commercially made cakes.  His comments definitely made my day!Smile

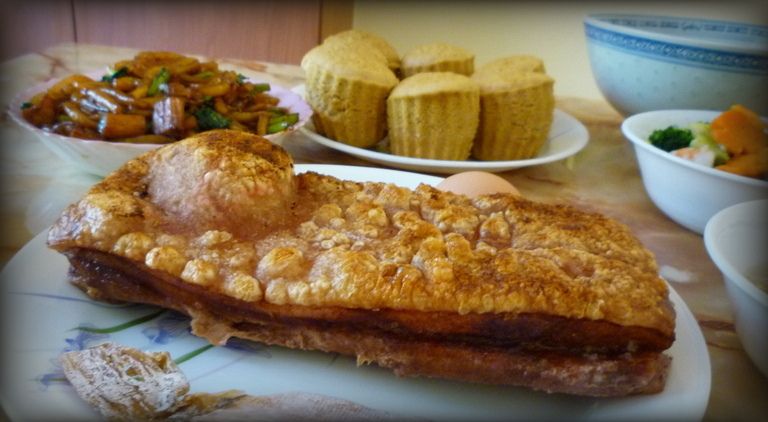
Other than the cake, I also made my signature crispy roasted pork belly.

choppedporkbelly_collage

With the help from my SIL, we successfully prepared a sumptuous home cooked birthday dinner for dad. It was a great dinner especially when you enjoyed it with your loved ones.

 IMG-20150922-WA0025

dad85birthday_collage

Japanese Light Cheesecake


IMG_20150916_091621

A) Cake Ingredients

250ml milk

240g cream cheese

60g butter

2 tsp. lemon juice ( helps cake set faster and brown slower and reduce the richness of the cream cheese)


B) Cake Ingredients

55g flour

20g corn flour


C) Cake Ingredients

6 eggs ( separated into egg white and yolks)

130g castor sugar


Method


1. Melt cream cheese, butter and milk over a double boiler.

2. Cool the mixture and fold in egg yolks, flour, corn flour and mix well. Strain mixture to remove lumps.

3. Beat egg white until foamy, gradually add sugar and continue to whisk until stiff peaks.

4. Add egg white mixture and fold into the strained egg yolk and cream cheese mixture by 3 batches and mix well in one direction.

5.Bang the mixing bowl on top of worktop 3-4 times hard to reduce the air bubbles on the cake, before placing into oven and bake in a preheated oven ( 170 C) using water bath for 45 minutes at 160C.

6. When the cake is done ( test with a skewer when come out clean), switch off the power and leave cake in the oven for 10 minutes and thereafter leave the door ajar for 20 minutes.

7. Remove the cake from the oven and cool for 30 minutes before removing it from the pan and peeling off the baking paper.


Tips:

· To avoid cake shrinking quickly, leave it in the oven (while off) with the oven door ajar until cake cool down then remove.

  • To avoid bottom of cake from becoming  too dense, must fold the egg white evenly with cheese batter in one direction.
  • To avoid cake browning too quickly, place tray at the bottom instead of in the middle rack of the oven. 


    日式芝士蛋糕

  •  

    A)蛋糕配料

    250毫升奶

    240克芝士奶油奶酪

    60克

    2茶匙。柠檬汁


    B)蛋糕配料

    55克低筋面粉

    20克玉米粉


    C)蛋糕配料

    6个鸡蛋(分成蛋清和蛋黄)

    130克幼糖


    方法

    1.用双煮沸法,熔芝士奶油奶酪,油和牛奶 时不时搞拌,直至完全溶解,没有粒粒和平滑把碗移离小锅待凉。


    2.待放凉些才加蛋黄拌匀拌入柠檬汁。先把低筋粉和粟粉拌匀。分三次筛入芝士混合物中,每次务必拌匀,确定没粉粒。再过筛芝士混合物以去块状物。


    3.把蛋白放入一个干净的盘中(注:一定要没有油和没有水份)。用电动搞拌器把蛋白打至起泡,才逐渐加白糖,继续至蛋白尖峰挺立。


    4.分3批次把蛋白霜加入蛋黄和奶油奶酪面糊中后同一方向拌匀。


    5.把面糊倒进焗盘中后,在台面上敲3-4次以减少气泡在蛋糕上,再置入另一个大焗盘。倒进半满的热水,小心放入焗炉中最低的炉架上以放置到烤箱和烘烤用水浴中法 以160℃烘烤45分钟。


    6.当蛋糕完成(用竹签插进中央,如没面糊黏着,表示蛋糕熟透

    ),关闭电源,让蛋糕在烤箱待多10分钟后开门虚掩20分钟。


    7. 从烤箱取出蛋糕冷却30分钟蛋糕脱模在铁架上放凉。


    温馨提示:

    • 为了避免蛋糕迅速萎缩,必免立刻把蛋糕取出。蛋糕留在烤箱,把烤箱门虚掩着,直到蛋糕冷却下来再取出。
    • 为了避免蛋糕底部太密集,当把蛋白霜加入蛋黄和奶油奶酪面糊中后要同一方向拌匀。
    • 为了避免蛋糕太快上色,把烤盘放置在托盘底部,而不是烤箱的中间机架。


  • Sunday, September 1, 2013

    Muah Chee ( Glutinous/Sticky Rice snack with Peanut) 花生芝麻糍粑

    This year, August the 14th was my late mother-in-law’s 5th passing anniversary or jìrì () in Chinese. As usual Auntie Lan would remind hubby of this occasion. Every year, without fail Auntie Lan would prepare mother-in-law’s favourite dishes to serve as prayer offering. This year, instead of the usual Teo Chew Cai Kuih that she used to make, hubby asked her to make Muah Chee. I had posted this snack recipe back in 2010 before when I resided in Auckland, with the steaming method from Agnes Chang’s Hawkers’ Delights cook book. This time I would like to introduce another traditional method of making Muah Chee. Shared below is not just the way of making sticky rice dough for Muah Chee, also how to make fine powdery ground peanut.   Photo edited with http://www.tuxpi.com Shown below were the offering dishes we made for late Mother-in- law. P111044601 As usual, I was responsible for my signature Crispy Roasted Pork Belly. Hubby did an awesome job in food cutting and food presentation, didn’t he? roastedporkbelly
    Crispy Roasted Pork Belly  

    Saturday, September 29, 2012

    Mung bean Paste 綠豆蓉餡


    HAPPY MOONCAKE FESTIVAL 中秋节快乐!
    mooncake
    In advance of the mid autumn festival (a.k.a. mooncake festival) tomorrow,I would like to take this opportunity to wish all my friends, relatives and readers a happy moon cake festival and happy reunion with your family.
    To the Chinese, especially those staying away from their home town, the mid autumn festival (八月十五中秋节)is a big day for them to rush back to get together and celebrate with family members. The Chinese believe full moon symbolises reunion (月圆庆团圆).
    This year, I had made both types of moon cakes, traditional baked moon cakes and snow skin moon cakes. (Click to access my old posts on moon cake making).
    I had made 3 types of fillings which were Taro paste, red bean paste and mung bean paste. For the first two, I had already covered in previous posts. Just click on the words to lead you to the posts.
    I brought these moon cakes and shared with my colleagues in the office a few days ago:
    2012mooncakemaking
    In conjunction with this happy occasion, I’m going to introduce another traditional moon cake fillings that I had used for my homemade moon cakes this year – Mung Bean Paste.
    Mung bean is more widely known as green bean in South East Asia. As the name suggests, they are green in colour but when their skins are removed, Mung beans are light yellow in colour.
    P1090586
    Mung Bean 綠豆

    When these green beans are left to germinate and grow in water for days, they become “bean sprouts”, a type of vegetable that is commonly used for stir-frying, salad and soup in many Asian cuisine.
    Check out my old post of Stir-fry Bean Sprouts with Prawn cutlets 豆芽炒虾球 this is a super fast and easy stir fry vegetable recipe.

    Similar to red beans, Mung beans are also widely used in Chinese cuisine especially as dessert filling when made into paste form.
    For the recipe I shared, I didn’t specify the measured quantity in details but merely sharing the major ingredients.  Usage ratio is very much depending on the flexibility of own taste preference.
    The result of my mung bean paste was a bit dry and crumby. To have a finer texture I recommend to blend it further with a blender just like the red bean paste method. If you wish to have creamier and more flavourful texture, I recommend to substitute water with milk or coconut cream but for weight watchers it's better to stick to water.Smile

    P1090590
    Mung Bean Paste 綠豆蓉餡

    Saturday, September 22, 2012

    HOMEMADE PASSION FRUIT YOGURT自制百香果酸奶

    Healthy and Cost effective homemade yogurt

    I forgot where I heard this quote which said there were 2 good habits that’re all good and no bad - swimming and yogurt! Hubby is a strong believer in this quote and has been promoting this health message to our boy from young.

    Frankly, I must admit all these years I have had no problem practicing the 1st habit but not so much on the yogurt part.  The reason that put me off from yogurt is its sour fermentation taste and smell. Only recently, knowing yogurt has a great benefit of slimming, I gradually acquired its taste and able to consume flavored yogurt.

    For us to maintain the swimming habit is no issue as we live only 5 minutes away from our club which has an Olympic size pool. However for the yogurt part, we tend to have some difficulty where the nearest store for us to get fresh yogurt is 30 minutes away. Not only is the distance a letdown, yogurt is quite costly too if consumed daily.

    Even though I’m a keen enthusiast in venturing into homemade cooking, homemade dairy products have never crossed my mind. Not until one day I stumbled upon a blog on cheesecake making that lead me to homemade cheese and yogurt.
    When I made further research on the Net and watched some YouTube clips, I was thrilled to learn that making own yogurt is so simple and need no expensive and special gadget such as a yogurt maker.  All we need are the ingredients of fresh milk (low or full cream), milk powder, yogurt starter and sterile bottles, towels and microwave/oven which are standard items found in most kitchens. Next is the incubating time for the live bacteria in the yogurt starter to do their gem in culturing the liquid milk into tart to yield yogurt.

    For my attempts, I made the yogurt at night around 9pm and by the next morning at 7am when I checked, I had beautiful fresh yogurt to serve for breakfast. Once you have successfully made the yogurt, do scoop out some of this yogurt and keep as yogurt starter for your next batch of homemade yogurt. Unless you are making yogurt daily, the yogurt starter can typically last for only 5-6 batches.   After that, you may need to buy new commercial plain yogurt to start the cycle again.
    My 1st attempt using pasteurized milk with the incubation time of 8 hours showed the resulting yogurt to be a bit too runny. As for my second attempt using milk powder and a longer fermentation time of 12 hours, the texture was firmer (like bean curb) with stronger and more sour fermentation taste which better suited hubby’s preference.

    homemade yogurt - 12 hours fermentation
    You may notice a layer of yellowish liquid when the yogurt formed; this is the Whey water which is rich in Whey protein, an ingredient that’s good for fat burning. That is why yogurt is great for slimming.
    A layer of Whey water on the surface of yogurt

    However for both Ming Ray and I who preferred to have fruit flavored yogurt, we decided to make Passion Fruit Yogurt.  The outcome was a big thumb up from us! You can also enjoy simple sweetened yogurt by merely adding honey into the homemade yogurt.
    Passion Fruit yogurt
    Are you a yogurt lover? A LOHAS (Lifestyles of Health and Sustainability) believer? Cost conscious in household planning? This homemade recipe is definitely a gem in your kitchen!

    Saturday, September 8, 2012

    Palm Sugar Steamed Cake 椰糖马来糕


     24th August 2012 marked the 8th day of the 7th month in the Lunar calendar and was my late mother in law’s 4 years passing anniversary.  To commemorate that, Auntie Lan reminded us to pay respect by making a lunch meal as prayer offering at home.
    With a week-long Raya break at home not going anywhere, I offered to make cake and my signature dish Hong Kong Style Crispy Roasted Pork Belly as part of the offering.  As I remembered my late MIL loved eating roasted pork.
    HK style Crispy Roasted Pork Belly
    The following steamed cake is a type of Malay Kuih/cake which is similar to Chinese “Huat Kuih” (发糕) commonly served in Chinese prayer offering. 

    Palm Sugar Steamed Cake 椰糖马来糕

    Palm sugar, also called Gula Melaka in Malaysia is a type of sugar made from palm tree. In Malaysia, this dark chocolate colored sugar is usually sold in a solid log form and the Malay loves to use it as sweetener to their dessert.


    Friday, February 11, 2011

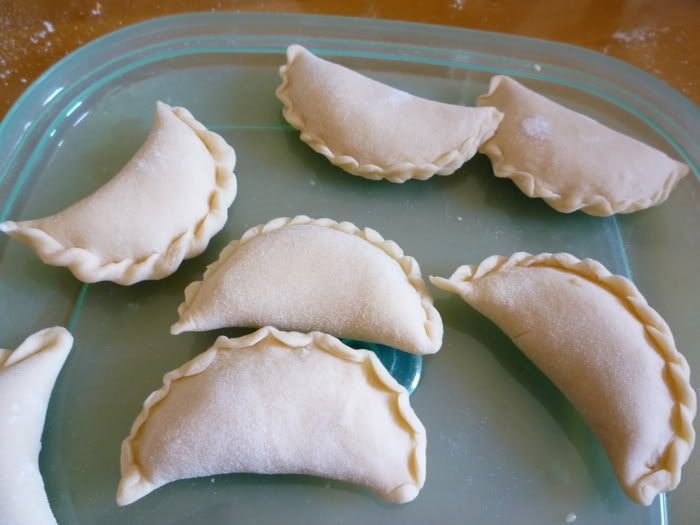
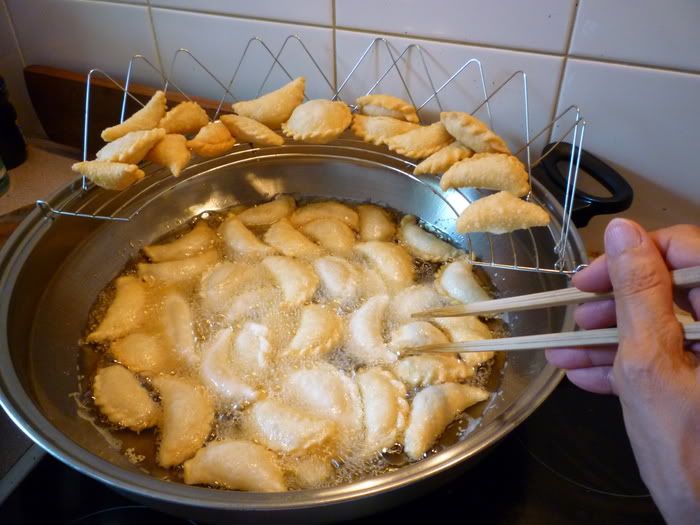
    Crispy Dumplings (Kok Chai) 油角仔


    Chinese New Year Dishes – Part 4(年菜之四)

    Last Thursday (3rd February) was the first day of 2011 Chinese Lunar Year, the beginning of the Rabbit year. First day of Chinese New Year (年初一)to me is a very special day, because I was born on this day too! When I was small, my mum used to celebrate my lunar birthday together with family reunion dinner on this day. I always like to think that when the whole world is celebrating CNY, they are celebrating my birthday too! J

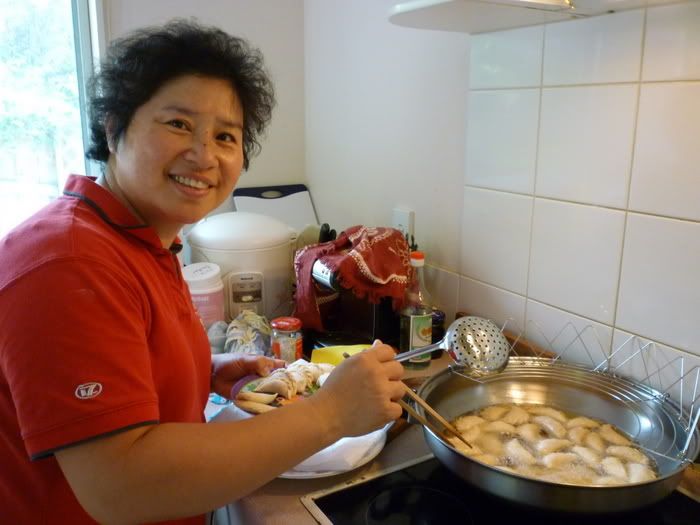
    I was disappointed, but expected, to note Chinese New Year was not observed as public holiday here. It was a normal working for JS. After a long summer break, Ming Ray began his first school day of year-2 on this day too. With them away, we weren't able to have much family celebrations, but I still followed the Chinese culture, by giving Ming Ray a red packet "Ang Pao" before sending him to school. However, thanks to my ex-computing cooking group, I still had an enjoyable CNY lunch sharing cum a small birthday celebration on this day after all.

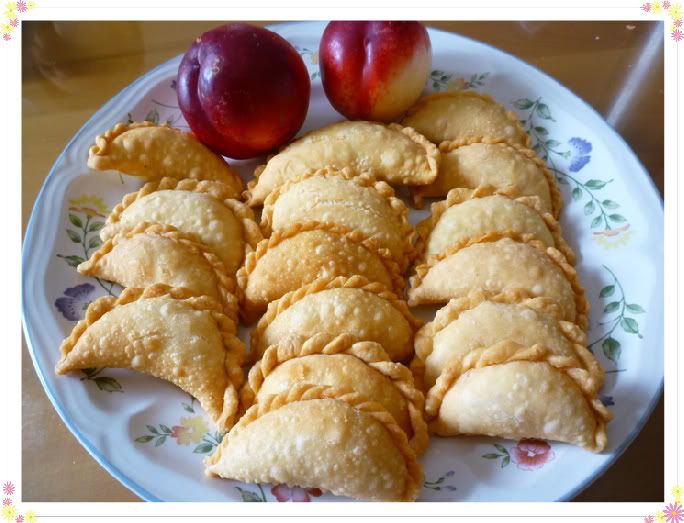
    This time the lunch sharing was organized at Vera's house. Like the past lunch gatherings, other than each cooking member bringing a plate for lunch, the host would also give cooking demonstration on her specialty. To celebrate CNY, Vera had shown us the making of Kok Chai (油角仔) which was a "must have" snack during Chinese New Year in her home town in Hong Kong. This little crispy dumpling has peanut as fillings, it is also called peanuts puff. The deep fried golden colour and shape of the puff is similar to gold bullions and a symbol of wealth.

    这是香港人过年必有的小吃,油角仔,因为包的是花生馅所以也叫花生角仔! 金黄金黄的油角,像铊铊黄金锭,很有新年好意头!

    Crispy Dumplings (Kok Chai) 油角仔 - Featured in Group Recipes 11/02/2011

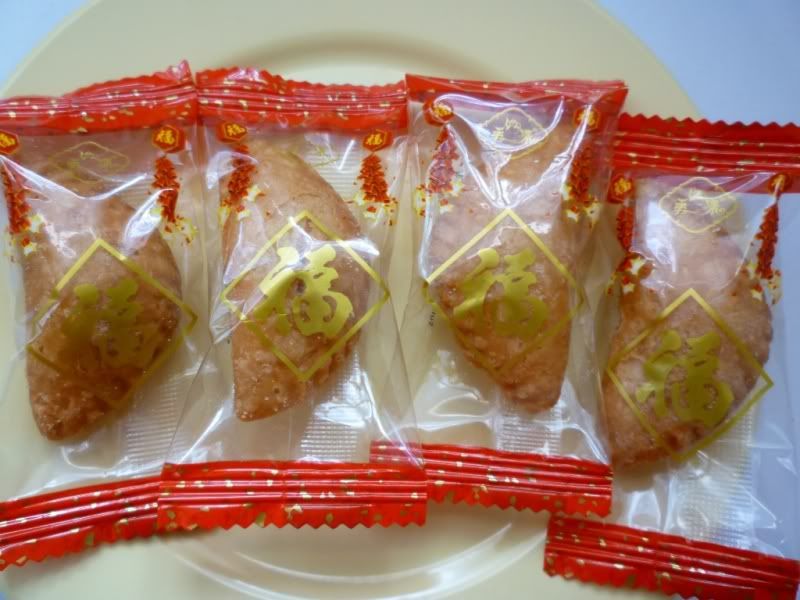
    Commercial made mini Kok Chai - CNY gift set

    Sharing the highlights of our lunch sharing and cooking demostration.


    CRISPY DUMPLINGS(KOK CHAI)
    Credit to Vera on recipe sharing

    Ingredients:
    Pastry
    600g high ratio flour/Cake flour
    (Chlorinated or high ratio flour, also known as Hong King flour, is special cake flour that is able to hold large amounts of liquid. This gives the cake produced a very soft crumb and a light, moist, fine texture.  They are also sweeter, have greater volume and a longer shelf life than cakes made with standard flour - extracted from Bake Info

    If cake flour not available, you can also try to turn all purpose flour into cake flour using following method. I extracted this from Joy the baker. )
    120 gm. margarine or butter or lard
    120g cold water
    2 large eggs

    Filling:
    300 gm. roasted peanuts – panfry skinned peanut, then remove the skins and chopped fine
    80gm. roasted sesame
    200 gm. caster sugar
    20g shredded coconut
    Oil for deep-frying(2 liters )

    Method:
    For pastry:
    Using the food processor/bread maker, put margarine, flour and eggs and water into the machine until it becomes a dough. Rest for 30 minutes to allow dough fully absorb the oil, egg and water.

    For filling:
    Mix all the ingredients together.

    To make the puffs pastry:
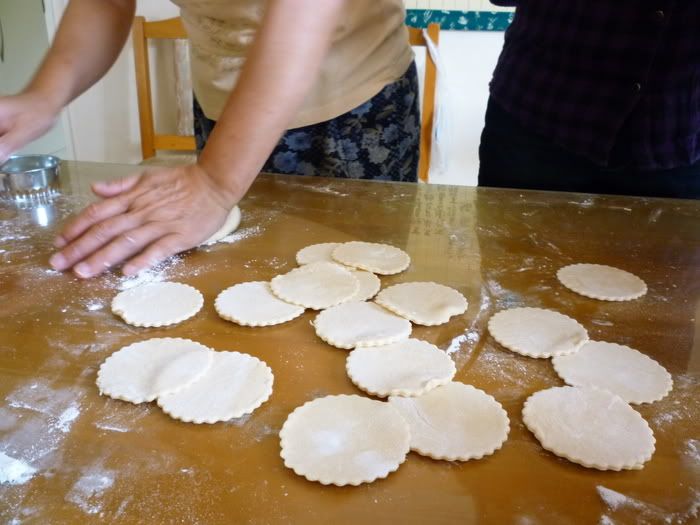
    Use the pasta machine to roll pastry or hand roll using rolling pin into a thin sheet and use cookie cutter to cut into 1 3/4 - 2 inches rounds.

    Put in 1/2 tsp of filling into the center of cut pastry and wrap up filling. Pinch edges neatly.

    Heat up oil to 170 for deep-frying peanut puffs and fry till golden brown using medium heat. It takes about 8 minutes.Remove and leave them on cooling rack.


    our Hong Kong born host - Vera
    Let it completely cool before storing into containers.

    Tips:
    Don't knead the dough too long will make dumplings skin not crispy but chewy. Rest dough for 30 minutes to allow dough fully absorb the oil, egg and water. This will make crispy dough skin when deep fry.
    油角仔

    皮材料 :
    600g低筋麵粉
    120g菜油或豬油
    120g水
    二粒蛋

    餡材料 : (份量隨個人喜愛)

    80g芝麻 (用慢火炒香待涼)
    300g有衣花生
    20g椰絲
    200g砂糖

    做法 :
    1. 用白鑊炒有衣花生, 去衣, 待涼後捣碎,(有衣花生不易炒燶) 將花生,芝麻及糖拌勻,備用。
    2. 將麵粉篩入大碗中,加入菜油(猪油),拌勻 逐少加入水 ,搓和成耳垂般软的面团,用濕布蓋住休息半小时。
    3. 在台上灑上麵粉,取出一小份粉糰,用麵棍壓薄,用杯子印成小圓模取起小圓模,包入適量餡料,對摺成半月形後再用力壓實.  用手指拉出邊位再屈摺入, 每摺入一次就再拉出一次直至尾部為止,收口鎖邊 (Crimping)。
    4. 烧热油后約170 ℃,转中温,炸到金黄香脆(約八分鐘)。放涼架或用廚房紙瀝乾油份待涼即成.
    貼士搓粉糰時不能太用力,搓至粉糰有筋性,油角便不鬆化;搓完更要靜置半小時,讓其完全吸收豬油、蛋汁及水,炸起來才鬆化。

    Thursday, December 23, 2010

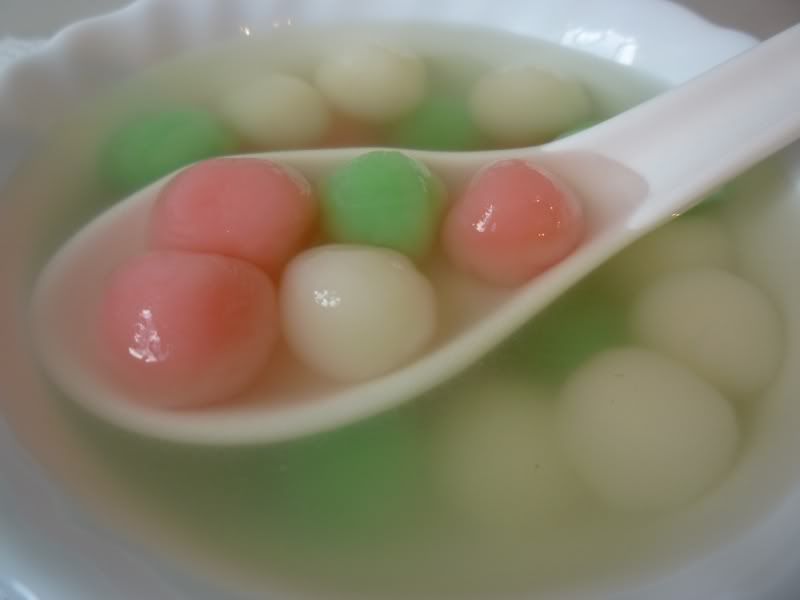
    Tang Yuan (Sweet Glutinous dumplings) 汤圆


    Yesterday 22nd December was what we Chinese call 冬 至which is translated in Englih as Winter Solstice. On this day in Northern hemisphere is the shortest day and longest night but we over in the Southern hemisphere experience the longest day and the shortest night of the year instead. Chinese believe after today the day will get longer and longer and this generates"Yang qi" a.ka. Positive forces so it should be celebrated. Hence, to some Chinese especially those in the mainland China, celebration for this day is even more important than the Chinese New Year (冬至大过年). If you are keen to find out more on the history, I will leave it to the experts to do the explanation, here's the link.

    Frankly I didn't understand the reason of celebration until I wrote this post. What in my memory since I was a small kid was on this day my mum would make Tang Yuan (glutinous dumplings) and asked us to eat. She said once we ate the Tang Yuan then we would get older by a year. I couldn't believe I did buy her saying when I was small and ate as many as I could so I could grow up faster. But I doubt I would want to eat any now if the saying is true! J


    Tang Yuan (Sweet Glutinous dumplings)  汤圆
    There are mainly two types of Tang Yuan one with filling and another without, which was the one I used to eat since I was small. Tang Yuan is not difficult to make at all, in fact it is the easiest Chinese dessert to make. Still, we got it wrong for the first time when I made this with hubby.

    The first year when we were married, we did not go back to home town to celebrate with our parents. Hence, he suggested making Tang Yuan on our own as he is a Tang Yuan fan. At that time I had little knowledge about cooking. I wasn't sure what flour to use for the Tang Yuan and suggested to ask mother-in-law for advice, but JS said he knew how to make it. I still could recall we spent whole night kneading the dough, added coloring to the dough and kneaded into many nice colorful round balls, but when we boiled them, the rice balls could not float even after being boiled for a long time (cooked Tang Yuan would float). In the end we realized we had produced a whole pot of bouncy rice balls instead of sticky chewy Tang Yuan, but why?

    Then we decided to give my mother-in-law a call to find out why. Only then we realized we had used the wrong flour to make Tang Yuan! We had used rice flour instead of glutinous flour! This is the biggest joke that I always tease him all the time. How bouncy the rice balls we had you might ask? If you run out of ping pong balls then you can try to make this as replacement J

    Well, this time with Auntie Ah Lan around, we won't end up with bouncy rice balls, in fact we get to enjoy the real authentic Malaysian style Tang Yuan, nice round glutinous dumplings in sweet rock sugar soup. This recipe that I'm sharing is without filling, which is very basic and can be prepared anytime of the year not necessarily on winter solstice.

    Actually to the Chinese, Tang Yuan with its round shape symbolizes reunion which is why it is also one of the main desserts served during Chinese New Year when all family members get together in a family reunion. Besides, it is also served on wedding day. The groom and bride customarily must feed each other Tang Yuan and they are not allowed to chew the dumplings, instead they are asked to shallow whole so the rice balls would remain intact to symbolize togetherness.


     For firmer and chewy texture of Tang Yuan, best knead the Tang Yuan in advance and left overnight to rest.


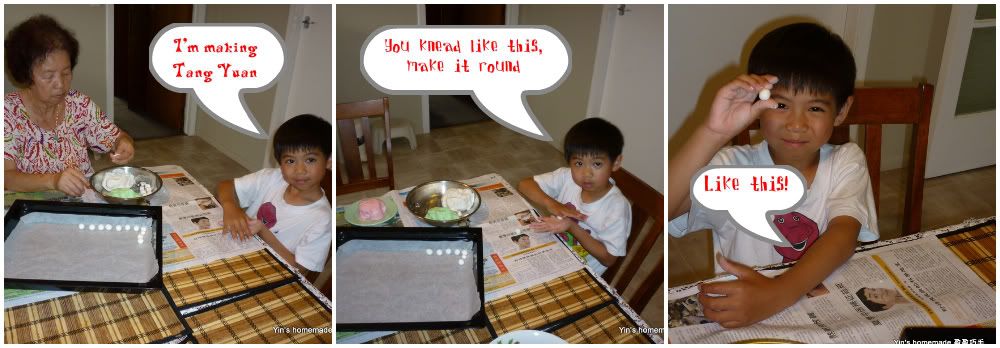
    Making Tang Yuan is also a great bonding time, the kids especially love the idea of kneading the rice dough because kneading the glutinous rice dough is similar to play-doh, and you can see how Ming Ray enjoyed his Tang Yuan play-doh with his auntie.

    Wednesday, December 22, 2010

    Kuih Sago( Steamed Tapioca Pearls Cakes) 椰丝西米糕 - Featured in Group Recipes


    Wanna a slice of gluten free sweet and chewy Nyonya kuih?

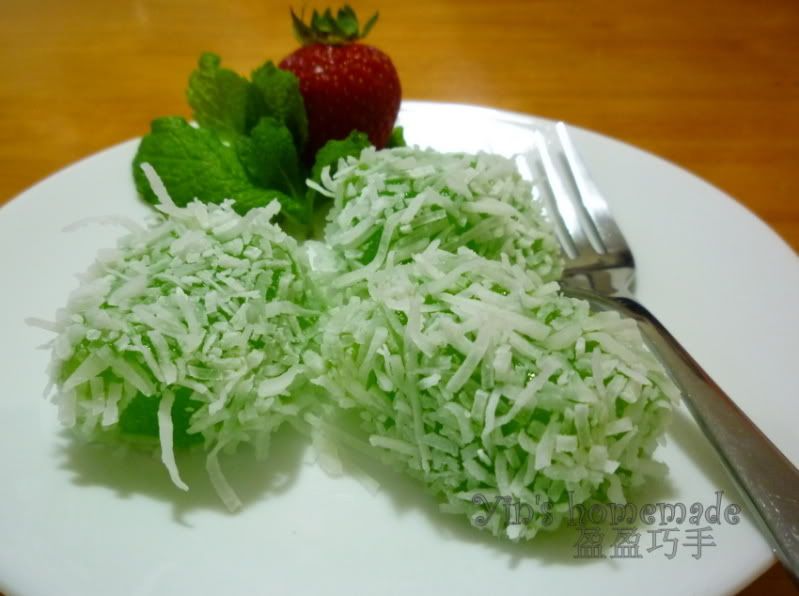
    This is another blissfully easy and delicious Nyonya kuih recipe, Kuih Sago. Sago, also known as Tapioca Pearls, is made of tapioca. Tapioca Pearls is one of the common South East Asian dessert ingredients, widely used in Malay, Nyonya and Thai desserts.

    This recipe was verbally taught by a Malaysian cashier whom I met at my regular Asian grocery store. It happened that one day she showed me the kuih which she made for her colleague as birthday treat and asked me what the proper name was for the kuih in Malaysia which she couldn't recall. I was of no help to her as I had no idea what the name for that kuih was. But since she said the main ingredient was sago, I guessed it must be Kuih Sago. She mentioned that the kuih was super easy to make, just "mix and steam", so it prompted me to give it a trial.

    I made this last Saturday and brought over as dessert to our regular Penang families dinner gathering. I used green Pandan flavor sago. Alternatively you can use white sago added with some coloring.


    These snowballs like of luscious gluten free kuih , can be a unique Christmas dessert recipe too.
    Kuih Sago 椰丝西米糕 - Featured in Group Recipes 21/12/2010

    Thursday, December 9, 2010

    Kuih Talam (Coconut Tray Cake) 娘惹香草糕 - Featured in Group Recipes


    Microwave Kuih Talam?

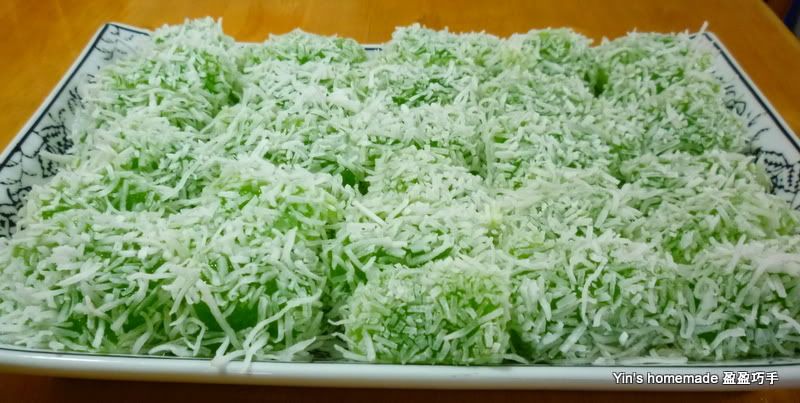
    This is another classic Nyonya dessert. Kuih is a common local Malaysian word for all Nyonya and Malay desserts. This popular kuih not only is one of Malaysian all-time breakfast favorite but also serves as great party snacks. This steamed coconut flavor rich dessert comes with top white layer made from coconut milk and rice flour and the bottom green layer is made from rice and mung bean flour with natural green coloring extract from pandan leaves a.k.a screw pine leaves.

    The instruction in the original recipe suggested cooking time of 1 hour, requiring slow simmering or double boiling in the kuih thickening process before steaming. I reckoned this traditional way of thickening process was quite time consuming. It struck my mind whether I could adopt the same microwave method that I applied in coconut egg jam, Kaya making to speed up the process.

    I gave it a try with the microwave method on my first tray. My first attempt was not as impressive as I was trying to find out the right time required to microwave-cook the batter to the right concentration before placing it into steaming tray for steaming. I over heated the green layer resulting in the green layer batter was over thickened and lumpy.

    However, since I had another half tin of coconut cream to experiment further, I proceeded with my second attempt. This time I knew that I shouldn't heat the green batter for more than 4 minutes in total and each session no more than 1 minute. It should be stirred constantly after every time it is taken out from the microwave. As for the white coconut cream batter, it only took about 2 minutes to thicken. I repeat the heating process more often with last minute at 30 seconds interval. The result, as can be seen from the photo, is a nicer smoother batter for both the green and white layers. J

    I didn't expect my little picky boy appreciate this classic kuih so much.


    Sunday, November 28, 2010

    Bubur Cha Cha 摩摩喳喳 - Featured in Group Recipes


    What for afternoon tea? A bowl of famous Nyonya Dessert – Bubur Cha Cha
    With our master chef around, we are not only getting to eat real "home" flavoured dinner, in weekend we get to enjoy authentic Malaysian desserts and snacks. The first on the list requested by hubby was Bubur Cha Cha.

    This is one of the renowned Penang Nyonya desserts. Bubur is Malay word for porridge or congee, as for Cha Cha , no one seems to know how this name originated. However, my aunt shared this with us. She said this dessert is one of the main desserts serve on 15th day and last day of Chinese New Year especially by Hokkiens. In Penang Hokkien dialects, bubur cha cha is pronounced bubur che che – and "che che" means abundance or plentiful. So, it's considered auspicious to serve bubur cha cha to family and friends on that day.

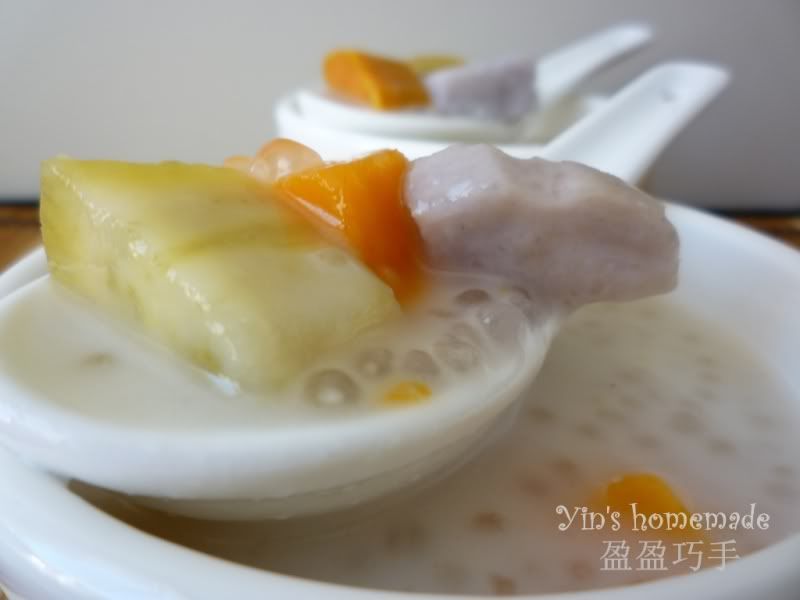
    This dessert is a sweet concoction with various types of sweet potatoes (the Kiwis call it Kumara), yam or taro, sago (Tapioca peals) and coconut milk (santan). Do try to use different types of sweet potatoes, to make the dessert more colourful. For healthy version you can change the coconut milk into evaporated milk instead, however you will miss the creamy coconut flavor. This dessert can be served warm or cold.

    We steamed all sweet potatoes and taro until tender then added with boiled coconut milk. This way the kumara and taro would not be too mushy. Hubby loves the taste of sago, which is chewy and stretchy in its texture, so we were asked to put more sago. One of the common cooking habits of the older generation is that they tend to cook more, so we ended up with a huge pot. Well, this seemed to be good news to my friends who stayed around my neighbourhood J

    Bubur Cha Cha  摩摩喳喳 - Featured in Group Recipies 28/11/2010

    No question needed to be asked on how good the dessert was, as both of my young and old food critics asked for second bowl, this showed how good the dessert was! I must say the kumara in NZ tasted much sweeter and aromatic than that in Malaysia. It also has a smoother texture.


    Saturday, October 9, 2010

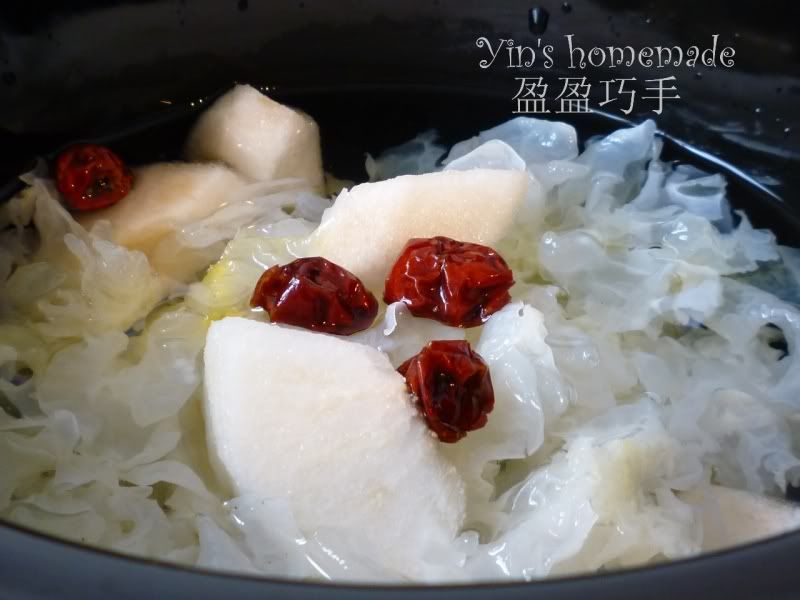
    WHITE FUNGUS WITH NASHI PEAR DESSERT SOUP 银耳雪梨糖水


    Wanna a bowl of nourishing sweet soup ?

    This winter, the nasty winter bugs had my two guys down one after another; JS suffered the most which later we suspected that it might be swine flu. I was pretty proud of myself for not catching the bugs back then and credited that to my regular jogging even under cold weather. But, too bad just when I thought the winter was over, JS had his second round of cough back last week and this time I was not spare. :-(

    Other than taking medicines, I believe in food treatment. Hence, this week I made Chinese herbal soups more often and one of them is this White Fungus with Nashi Pear Dessert Soup. Chinese believed white fungus which also known as Snow Fungus is great in nourishing the lungs, healing dry cough and cooling our body system. This soup is great to serve hot during winter and chilled during summer. This dessert is very simple and easy to prepare.


    Wednesday, September 22, 2010

    Muah Chee (Steamed Glutinous Paste with Peanut) 花生芝麻糍粑


    Muah Chee is one of my favorite childhood desserts. During one gathering, I showed off my cook books to my Auckland friends' Cheng Im and Cheng Ee (whom also came from Penang). When we flipped to the page of Muah Chee, all of us exclaimed the same remarks "I missed this food!" So, on one easy Sunday afternoon, we gave it a try and it was another success.

    When I tasted the muah chee, it brought back so many good old childhood memories. I recalled when I was small, nearly once a week, there was an old hawker cycling around our neighborhood and yelling "Muah Chee" and the kids would rushed out with coins in their hands lining up to buy this delicious peanut coating glutinous balls from him. Those were the days; now you hardly find muah chee selling off street.

    In fact, before we moved here I did request Ming Ray's nanny to teach me to make muah chee. However, her method was much tiring. Instead of steaming she boiled the dough. Once the dough is cooked and float on the water, removed and while it is still hot, you need to keep stirring until smooth. I found this method was quite tiring and you need strong hands to do the stirring, as the glutinous dough was too sticky and hard to move.

    This recipe is much easier, even the recipe requested you to stir after steaming the dough, if you have no strength to stir till smooth don't bother, once you coat the dough with peanut who will notice whether the dough is smooth or not. The only tedious part is to make ground peanuts, but if you get to buy the readymade ground peanut, it does save you lots of time and hassle.

    I didn't have time to take a nice photo for this dessert; we finished it before I can even get a nice photo out from them! J (Move mouse over the photo to see the steamed dough)
    @15/07/2010

    LinkWithin

    Related Posts with Thumbnails