
I started to make this dough a night before to try out the slow
rising method. Letting the dough rise in
the fridge overnight saved time and increased flavor to the dough. That night after dinner, I started to prepare
the ingredients. After pouring all needed ingredients into the mixing bowl, I
sat down in front of the TV and applied my multitasking talent - kneading the dough
and watching online soap drama simultaneously. It took me more than 30 minutes to
massage the dough until it became ready for proofing. Well, that’s how a busy
working mum like me made time for her after work entertainment - watching
downloaded drama. J
The next morning at 7.30am, I checked on the dough, it did
proof to about 75% of the original size.
As we already had a plan to take Ray to a nearby park for morning jog,
I asked Auntie Lan only to take out the dough from the fridge about an hour
before our planned return time. Upon our return at 11.30am, Auntie Lan already
had the dough left in room temperature for half an hour, I felt the bowl was still
pretty cold. It took about an hour more before the dough was at room
temperature and doubled in size.
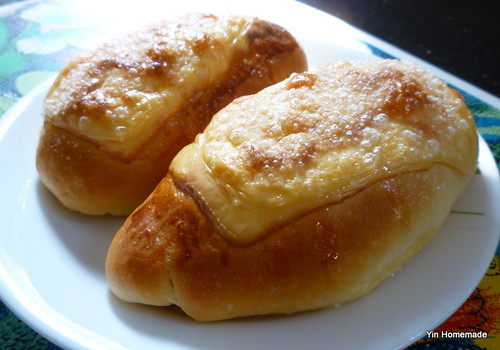
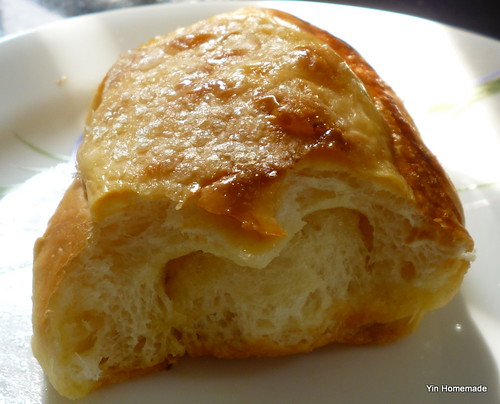
I think this batch of non Tangzhong starter bread was so far
my best sweet buns; the bun texture was so soft and wholesome with strong buttery
flavor. When the buns came out from the oven in the afternoon, hubby
surprisingly asked to have the buns for afternoon tea. He seldom likes bakery and it got me even
more surprised when he ate 3 buns at one go!
Well, I guess one of the reasons why he liked the buns was
the butter in the bun. He isn’t into bakery but he just loves butter J
Butter cheese Bun

INGREDIENTS A
500g
bread flour or high protein flour
8g
instant dry yeast
80g
castor sugar
7g
salt
INGREDIENTS B
1
small (50g)egg (beaten)
250ml
cold fresh milk
INGREDIENTS C
60g
soften butter
INGREDIENTS D
6-8 pc
Cheese (slice into half)
50g
castor sugar
160g
butter (cubed)
1
egg (beaten for egg wash)
(Serving about 16 buns)
METHOD
1.
Mix all ingredients (A+B) knead till it can be
stretched into thin sheet.
2.
Add in butter and knead until the butter is combined
with the dough, continue until it becomes smooth.
3.
Place the dough into a lightly greased bowl
and cover with greased cling wrap to proof till double in bulk.
4.
When dough doubled in size, test the dough for
readiness - press dough with finger, if the impression stays and the dough
does not spring back then it is ready.
5.
Punch down and knead again till
smooth. Rest for 15 minutes.
6.
Divide the dough into 60g each portion, roll
flat dough and add in butter and wrap
up to form into oval shape, arrange in a greased square baking tray covered
with greased cling wrap and let dough prove for second time (about 1 hr).
7.
When the dough rises for second time, brush dough
with egg wash and top with cheese slice, sprinkle with some castor sugar.
8.
Bake at 190 degree Celsius for 15 minutes till
golden brown.
9.
Remove
and cool on wire rack.
芝士牛油面包
材料:
A料
500克面包粉或高筋面粉
7g 速溶酵母
80克细砂糖,
7g盐
B料
250ml牛奶
1鸡蛋(打散)50克,
C料
60克软化无盐牛油
D料
6-8件芝士(成半片)
50克细砂糖
160克牛油(切块)
鸡蛋1只(涂抹蛋汁)
面包做法:
将所有材料面粉,酵母,糖和盐放入碗中搅拌均匀, 加入鸡蛋, 慢慢地倒入牛奶。
使用慢速度,拌打面团,直到面团形成可以拉得很薄又不会裂与有弹性。如果用手揉,揉面团至少15-20分钟 ,直到面团光滑。加入牛油揉至均匀。
将面团取出揉成圆形,放入抹油的碗,用抹油过的保鲜膜盖上。让它发至双倍。(放在温暖的地方,以加快发面过程。)把面团打下再揉至光滑,休面15分钟。
把面团分成60克份,滚平面团包入牛油块,
包裹成椭圆形,排放在抹油过的四方烤盘.
用抹油过的保鲜膜覆盖让它再发第二次面至双倍大。当面团发好, 用刷涂抹蛋汁在发好的面团,加上半片乳酪在面团上,撒上细砂糖。
烤在摄氏190度15分钟至金黄色,
取出并冷却。
|

Looks good Pheow and lots of interesting recipes. they don't look too difficult or is it just the way you write it that makes we want to get my hands covered with flour and dough...something which I hate ?
ReplyDeleteHeah:
DeleteGreat to have you here, well bread is not hard to make at all, if you do not favour in getting your hand mess up with flour, buy a mixer solve your problem. :-P
You have obviously made these with love and it shows. They look delicious.
ReplyDeleteDear Suzanne:
DeleteThanks for dropping by. I always believe when you cook with TLC, the food tend to taste great!:-)
So much time went into these little buns. I bet it was all worth it. They look amazing.
ReplyDeleteBeth:
DeleteThanks. Love your blog and congratulation to you -a soon to be mum.
The bread looks so good.
ReplyDelete