Showing posts with label Cantonese Cuisine. Show all posts

Tuesday, September 22, 2015

Coca-cola Chicken Wings 可乐鸡翅

Recently, I took a break from my career and went back to hometown, Penang to help my dad to renovate our old house while spending some quality family time with him. With the old house under full renovation and not in livable condition, we temporarily moved to stay with my second brother and his family.

Other than an hour or two daily playing a Project Manager's role checking on the renovation status, I had a very relaxing schedule in Penang. With ample time to spare, I took over sister-in-law's kitchen to prepare dinner for the family to ease her busy working schedules.

Frankly, I have not been cooking for a long long time. In fact, ever since we moved back from Auckland and with Auntie Lan back to live with us and taking over my kitchen, I have not been using the wok spatula for quite some time already.

In the hope to prepare good meals for dad, I regained the passion to try out new dishes again. I found this simple and easy recipe via Facebook.

Coca-Cola Chicken Wings (可乐鸡翅). Yes, no kidding, this recipe only uses the famous Coca-Cola soft drink and soya sauce as main ingredients with no water added in. I also wish to clarify that this is not a Western cuisine, even though Coca-Cola is originated from the USA, Coca-Cola Chicken is one of the famous Chinese dishes in Southern China.


Well, this is another good example of the East meets West fusion.


IMG_20150907_185239
The use of Coca-Cola with high sugar content easily caramelized and tenderized the chicken, leaving a sweet, sticky and glazed appearance on the chicken wings.


It might not be a top pick in a healthy menu list for dad but it was a sure winner for the kids and party menu. In fact, I must admit to a certain extent, it was tastier than the traditional soya sauce chicken.


Coca-cola Chicken Wings
IMG_20150907_185211

INGREDIENTS:
8-10 chicken wings ( cut into drummettes and wings, you can also use drumsticks )
1 tin of Coca- Cola ( not recommended to use diet coke)
1-2 tbsp. Soya sauce ( to your own taste)
1tbsp. dark soya sauce ( to your own taste)
1 tbsp. Chinese   Shaoxing cooking wine ( optional)

Spices
1-2 pieces of Star Anise, cinnamon sticks
Few slices of ginger
Few stalks of green onions, cut the white section into 2-3 cm long, the green leaves chopped

MARINADE: (best more than half an hour )
1 tsp. of salt
1 tsp of Sesame oil
1 tbsp of Shaoxing cooking wine (optional)
Dash of pepper

METHOD:
  1. Clean wings, pat dry with kitchen towels and score them symmetrically on both sides set aside.
  2. brownchickenwings_collage
  3. Place the cleaned chicken wings into a basin, and add the marinade seasoning and half of the green onion sections and ginger slices. Mix well, and leave to marinate for half an hour.
  4. Heat wok with some cooking oil, brown the chicken wings for a minute, dish up and set a side.
  5. Pour out the excess cooking oil leaving just one tbsp. of cooking  oil in the wok and sauté the left over sliced ginger, green onion and spices in the wok until fragrant.
  6. cocacola_chicken_collage
  7. Add the browned chicken wings and stir well.
  8. Pour in 3/4 tin of Coke and 2 tbsp. of soya sauce and dark soya sauce and stir well.
  9. Cover it and simmer over medium heat for 25 minutes.
  10. cokechicken_collage
  11. When chicken is done and turned into caramel color and drying up, add a tbsp. of cooking wine and stir evenly. Turn off the heat,  transfer chicken wings to a serving platter and serve.

可乐鸡翅

材料
8-10全鸡翅膀切成鸡翅中段和小腿你也可以用鸡腿)
1罐可口可乐(不推荐使用健怡可乐)
1-2汤匙酱油(随自己的口味)
1汤匙黑酱油(随自己的口味)
1汤匙绍兴料酒(可选)

调味品1-2枚八角,肉桂棒
生姜几片
青葱,切白色部分为2-3厘米长,叶子切碎

腌料:(最好超过半小时)
1茶匙盐
1小勺香油
1汤匙绍兴料酒(可选)
些许胡椒粉
方法:
  1. 将清洗过的鸡翅厨房纸巾轻轻拍干,倒在盆里,加入腌料和一半的葱节和姜切片拌匀腌半小时。
  2. 炒锅烧热放一些食用油,把鸡翅炒匀煎黄一分钟,盛起备用。
  3. 倒出多余的食用油,剩下一汤匙在炒锅,加入姜片,葱花和香料炒香。
  4. 待香味, 加入鸡翅炒匀。倒入3/4瓶可乐和调味料 2汤匙酱油和黑酱油炒匀试味。
  5. 加盖,中火煮25分钟,当鸡熟了,变成焦糖色并开始干起来添加一个汤匙料酒,搅拌均匀后,关火,
    取出上碟。


Saturday, September 29, 2012

Mung bean Paste 綠豆蓉餡


HAPPY MOONCAKE FESTIVAL 中秋节快乐!
mooncake
In advance of the mid autumn festival (a.k.a. mooncake festival) tomorrow,I would like to take this opportunity to wish all my friends, relatives and readers a happy moon cake festival and happy reunion with your family.
To the Chinese, especially those staying away from their home town, the mid autumn festival (八月十五中秋节)is a big day for them to rush back to get together and celebrate with family members. The Chinese believe full moon symbolises reunion (月圆庆团圆).
This year, I had made both types of moon cakes, traditional baked moon cakes and snow skin moon cakes. (Click to access my old posts on moon cake making).
I had made 3 types of fillings which were Taro paste, red bean paste and mung bean paste. For the first two, I had already covered in previous posts. Just click on the words to lead you to the posts.
I brought these moon cakes and shared with my colleagues in the office a few days ago:
2012mooncakemaking
In conjunction with this happy occasion, I’m going to introduce another traditional moon cake fillings that I had used for my homemade moon cakes this year – Mung Bean Paste.
Mung bean is more widely known as green bean in South East Asia. As the name suggests, they are green in colour but when their skins are removed, Mung beans are light yellow in colour.
P1090586
Mung Bean 綠豆

When these green beans are left to germinate and grow in water for days, they become “bean sprouts”, a type of vegetable that is commonly used for stir-frying, salad and soup in many Asian cuisine.
Check out my old post of Stir-fry Bean Sprouts with Prawn cutlets 豆芽炒虾球 this is a super fast and easy stir fry vegetable recipe.

Similar to red beans, Mung beans are also widely used in Chinese cuisine especially as dessert filling when made into paste form.
For the recipe I shared, I didn’t specify the measured quantity in details but merely sharing the major ingredients.  Usage ratio is very much depending on the flexibility of own taste preference.
The result of my mung bean paste was a bit dry and crumby. To have a finer texture I recommend to blend it further with a blender just like the red bean paste method. If you wish to have creamier and more flavourful texture, I recommend to substitute water with milk or coconut cream but for weight watchers it's better to stick to water.Smile

P1090590
Mung Bean Paste 綠豆蓉餡

Sunday, October 31, 2010

Spiced Beef Shin 卤牛展/牛腱 - (Featured in Group Recipes)


"Staying in Kiwi land, how can you not eat more beef or lamb where we are one of the biggest meats producers! " This statement was made by one of my computing classmate when she shared her lunch box with me. After testing her juicy spiced beef, I came home and happen to notice one of the cook books I borrowed from local library has this recipe which I can try on.

Frankly, the reason I seldom cook beef is because I'm not good at cooking beef, my food critic always X me out when I served beef. This was my first time cooking beef shin/shank; thankfully the dish turnout to be pretty good and I got a tick this time J

Spiced Beef Shin 卤牛展/牛腱 - Featured in Group Recipes dated 3 November 2010

Saturday, October 16, 2010

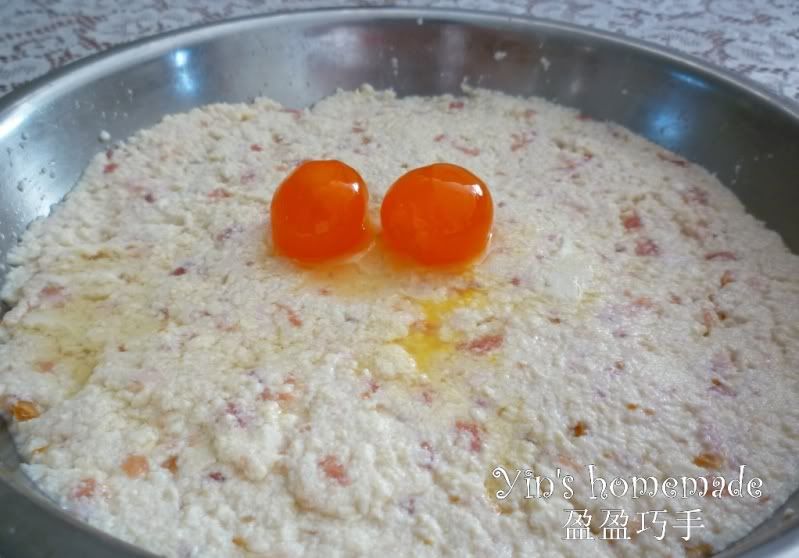
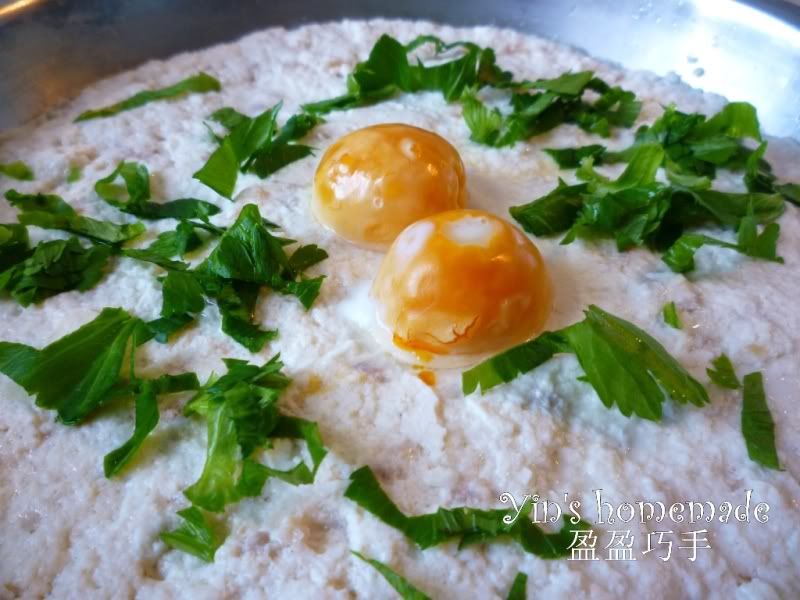
STEAMED TOFU WITH SALTED EGGS 老少平安


I like the Chinese name given for this dish 老少平安 , the name literally in English means "Elderly and young peace". I was introduced to this dish when I mentioned to one of my computing classmate Penny from Guangzhou what to do with the surplus egg whites that I have in fridge after making Portuguese egg tarts. She further explained the reason of naming "Elderly and young peace" is because the soft and smooth texture of the dish with main ingredients of tofu, fish paste and egg whites is perfect for young and elderly without worrying about missing teeth and choking problem with fish bones, therefore everyone is safe to eat. :-)

Frankly, this traditional home-style Cantonese cuisine and also regards as "lazy people food" recipe is similarly to steam eggs with variation of adding tofu and fish paste. Of course, there are other variations some even mixed with shrimp and mushrooms. My version, I didn't have any fish paste so I replaced with pork mince and added my homemade salted eggs as topping.

Steamed Tofu with Salted eggs
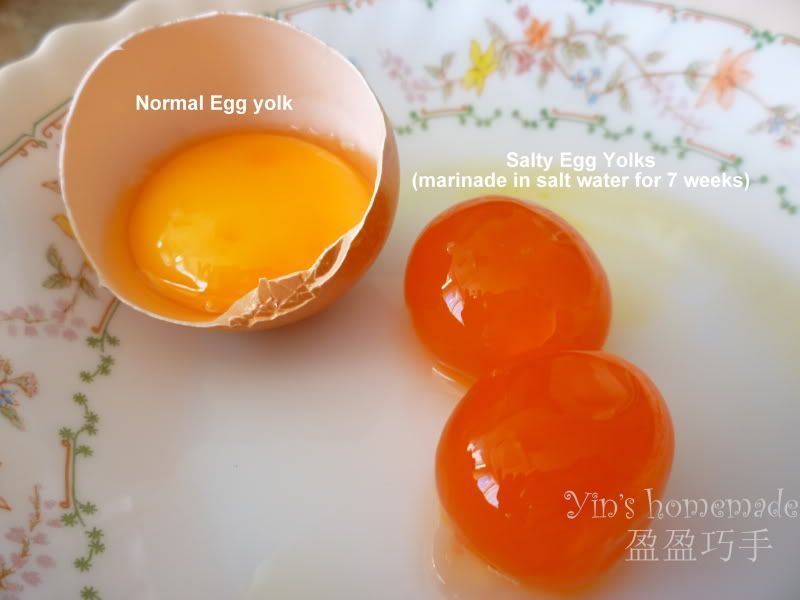
Homemade Salted Eggs
Salted egg yolks vs normal egg yolk

Tuesday, September 28, 2010

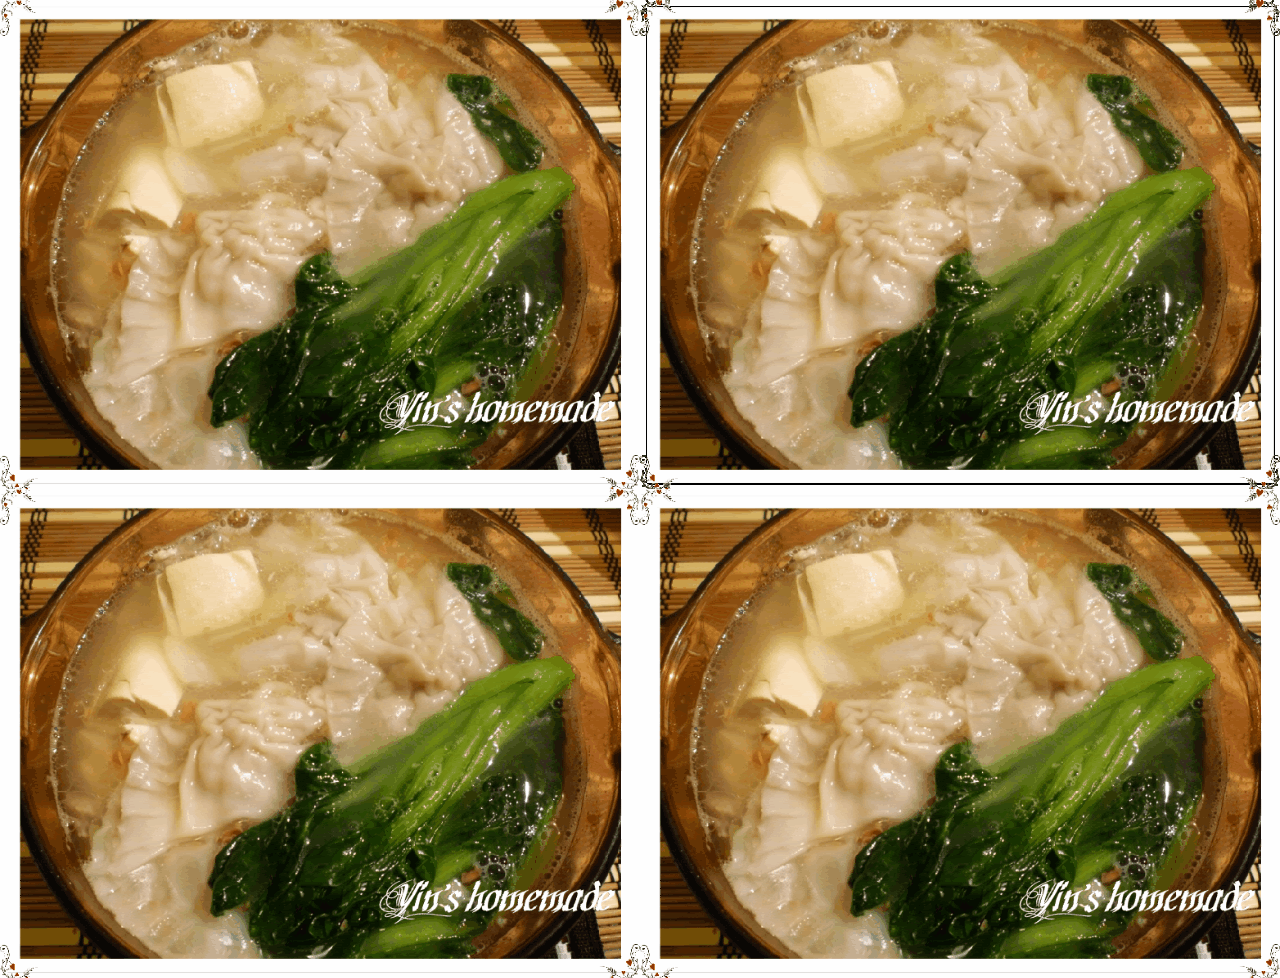
Wanton Tofu Vegetables Soup 云吞豆腐塔菜汤


Back home we seldom appreciate hot soup, we tend to wait for it to get cold to drink it, but once we are here, nothing warms the chill of a cold winter's night as a hearty bowl of hot soup! Sipping a bowl of steaming hot soup is real treat on a cold weather like what we have now.

However, to have a nice soup you need to simmer at least 2-3 hours; it is not convenient to do that on daily basis. So, to have an easy way out, I used to cook a big pot of pork bone and chicken frames stock and then divide the stock into small packets and freezer them. I used one packet for one meal, I just need to heat it up and add in vegetables, dumpling, tofu or fish balls and viola a bowl of hot soup is ready within 10 min for dinner!

I like to add dumpling or wanton in my instant soup. Nowadays, making wanton or dumpling is much easy and simple. Off-the-shelf wanton wrappers are easily available, one just needs to add in mince or veggie filling and wrap them up. But, some of you might say, wrapping wanton/dumpling need skills too! I said not at all, see the photo below, nice?
There is a secret in it, the secret is….ok, I'll let you figure out yourself if you still can't leave me a comment I will review how:-P

Below is my version of 10 minutes (exclude the making of wanton) soup, you can throw in whatever veggie, seafood and meat that you can find from your fridge as you like, just be creative and dare to explore you will surprise to discover new flavor out from ordinary dish!

Tuesday, September 7, 2010

BBQ Pork (蜜汁叉烧)


Other than Roasted Pork Belly (烧肉) which I had covered in my August posting BBQ Pork (叉烧) also known as Char Siu in Cantonese is another famous Hong Kong style BBQ dish that many like to eat.

At one of our regular lunch sharing gathering with my computing class cooking members, Doris from Hong Kong has taught us the easiest way to make Char Siu which taste like what you can expect in HK BBQ restaurants.

Well, it might not be 100% homemade as we skipped the tedious steps of making Char Siu sauce by using ready-made sauce instead but it produced the same drool-worthy BBQ pork that one hardly resist!
Interested to know more, scroll down and get the recipe, happy trying!.
BBQ Pork (蜜汁叉烧)


Ingredients


Method:


  1. Wash meat and pat dry with paper towel and cut pork fillets into strips
  2. Marinate evenly with Lee Kum Kee Char Siu Sauce. Initially, the sauce is quite sticky and gluey to spread over fillets. Once being left in the fridge for a while it will get diluted.
  3. Marinate for at least 2 hours, best leave overnight to allow the flavors to seep in (I stored them in covered container and left overnight in fridge).
  4. Pre-heat oven at 230 degree C.(Mine is not fan oven)
  5. Place marinated fillets on baking tray with aluminum foil on the bottom for easier cleaning. Keep marinade aside for basting.
  6. Bake for 10 minutes; flipping fillets over basting with marinade and bake at lower heat at 200 degree C for another 20 minutes..
  7. For better juicy effect, repeat the flipping and basting at least 2 times.
  8. Take out and glaze with honey and change oven mode to grill 180 degree C, return to higher rack to grill for another 5 to 10 minutes or until it is charred but not burnt.
  9. Remove from oven and let cool for a few minutes. Transfer to a cutting board and slice into thin pieces.
  10. You can serve this with rice or wanton noodle or even use as filling for char siu bau (pork bun)


成份
  • 500克猪柳片(梅头肉)
  • 6大汤匙李锦记叉烧酱
  • 蜂蜜(上色)
方法

1。洗净切成猪柳片,用李锦记叉烧酱均匀的腌猪肉。最初,酱是很粘。一旦被留在冰箱一段时间它就会稀释。
2。腌至少2个小时,最好腌过夜,让味道渗入(我存放在有盖容器中,并留在冰箱过夜)
3。烤箱预热至230摄氏度(我的是不是风扇烤箱).
4。将腌好的猪柳放置在底部有铝箔的烘烤盘上。保留腌猪柳
5。
10分钟后; 用夹把叉烧反转淋一点腌汁,焗炉转200度焗20分钟。过程中时不时翻面如果太乾淋一点腌汁。
6。取出
再将蜂蜜涂在肉上上色,放回较高层烤箱里
改为180摄氏度烧烤5到10分钟或直到它被有烧焦的买相为止。
7。从烤箱取出放凉了几分钟
把多余的蜜汁滴一滴,切成薄片。
8。你可以配白饭或云吞面条。


Wednesday, August 25, 2010

Crispy roasted pork belly (脆皮烧肉)

What's for dinner tonight?
Ming Ray's favourite's Crispy roasted pork belly 脆皮烧肉!
 
Ever since May 2010 when my computing classmate Jenny from Hong Kong, taught me the easy way of home baking crispy roasted pork belly (脆皮烧肉) , we no longer need to patron local Chinese restaurant every week for this dish, great deal of $ has been saved. It has also became one of my signature dish among my Auckland friends.

Combining efforts from online recipes, I managed to improvise a simple yet fool proof recipe to share.

Crispy roasted pork belly (脆皮烧肉)
I'm glad this recipe gets featured in Group recipes homepage for one of their best of week recipes 16/10/2010. http://www.grouprecipes.com/
 

May 2014 updates :
Just noticed that, I had used this recipe for the last 4 years and I must admit it has since be my signature dish serving on my dinner table every now and then especially during festive occations, it serves to be a routine dish.
Hubby has even master the skill in cutting and presentation too, you can tell from this photo:
roastedporkbelly

Ingredient:

Pork Belly 五花腩- about 1 kg
Coarse salt 粗鹽

Seasoning 燒肉醃料
  1. Shaoxing wine/Cooking wine 紹興酒 1湯匙 - 1 tbsp 
  2. Salt 幼鹽 - 2-2.5tsp
  3. Sugar 糖 1/2 tsp
  4. Chicken Stock powder 雞粉 - 1/4tsp
  5. Sand Ginger powder 沙薑粉 1tsp - optional
  6. Five spice powder 五香粉 1/2-1tsp – I put 1 tsp
Preparation Step:
  1. Wash the pork belly and remove any hair on the rind/skin, pat dry with paper towel.先将五花腩皮上的污秽物及拔除毛洗净抹干水.
  2. Prick/poke the rind as many holes as possible, this is important step to make the rind crispy. I poke holes using the sharp tip of the veggie and fruit peeler. 用猪插在表面刺松皮, 剌多都不怕,因为剌少会影响皮脆。

  3. Made a few slits on the meat for better absorption of seasoning.把肉开缝以更好地吸收调味。
  4. First coat the rind and pork belly meat with cooking wine, then only marinate the meat with above seasoning but not the rind/skin. 腩肉都涂抹上绍兴酒和腌料, 记住腌料只涂抹在肉上,皮是不用腌的.

  5. Air dry the whole pork belly openly in the fridge with the rind facing upward. Ok to leave in the fridge for days until you wish to bake. Best to leave it for at least 1 day to have good crispy result. 放进冰箱风干,  至少一天。
Baking Step 烘烤步骤
  1. Wrap the pork belly with aluminum foil and place in a baking tray, make sure the height of the foil is 1 inch  higher than the pork belly. 用钖纸先包在密五花腩, 留下猪皮部位不用包着.
  2. Coat a layer of coarse salt fully covered on the rind, this to make the water at the rind surface to evaporate to achieve crispy skin effect. 包好腩肉后, 在猪皮上倒下约一吋厚粗盐. 用盐焗是因为要令到猪皮表面水份全部蒸发, 达至表皮松脆效果, 所以没有被粗盐覆盖的地方会较韧.
  3. Pre-heat the oven at 230 degree celcius for 15 min. 先将焗炉以230度预热15分钟.
  4. Bake the pork belly at the center of oven for 50 minutes. 将包好既腩肉放入焗炉内焗50分钟.
  5. After 50 minutes, take out the pork belly and get rid of the coaarse salt. 过了50分钟后取出将盐起走,
  6. Change the bake mode to grill and reduce the heat to 210 degree celcius and put back pork belly at higher rack of the oven to girll for another 20 minutes or until the rind is crispy. 更改焗式变烤式,减少热至210度摄氏再将烧肉放回焗炉再以210度烤20-25分钟, 烤至猪皮松脆.
  7. From my experience the rind will start crackling after 15 minuets at grill mode. 以我的经验,腩肉外皮会在15分钟以后开始脆皮。
  8. Take out from oven and let it cool before served. 烧肉稍凉后斩件上碟. 完成

LinkWithin

Related Posts with Thumbnails